Adding Identity Provider
Prerequisites
- User with access to IAM (a.k.a. Keycloak)
- User in Keycloak with the Role manage-identity-providers (see Assign manage-identity-providers role)
Assign manage-identity-providers role to a user
-
Go to the IEM url and log in using the customer_admin user, or any existing users with access to IAM:
https://<IEM-IP or HOSTNAME> -
Once logged-in select the Identity & Access Management tile in the launchpad.
-
Navigate to Users and click on customer_admin
-
Switch to the Role mapping tab.
-
Click Assign role and then select in the Filter drop-down Filter by clients
-
Search and select the realm-management manage-identity-providers Role.
-
Click Assign.
The respective roles has been assigned to the user.
Via OIDC
The following step-by-step instructions describe the process of connecting Keycloak to Auth0 using OIDC as an example. More information on federation with OIDC can be found here.
To connect Keycloak to Auth0 via OIDC, proceed as follows:
-
Log into Auth0.
-
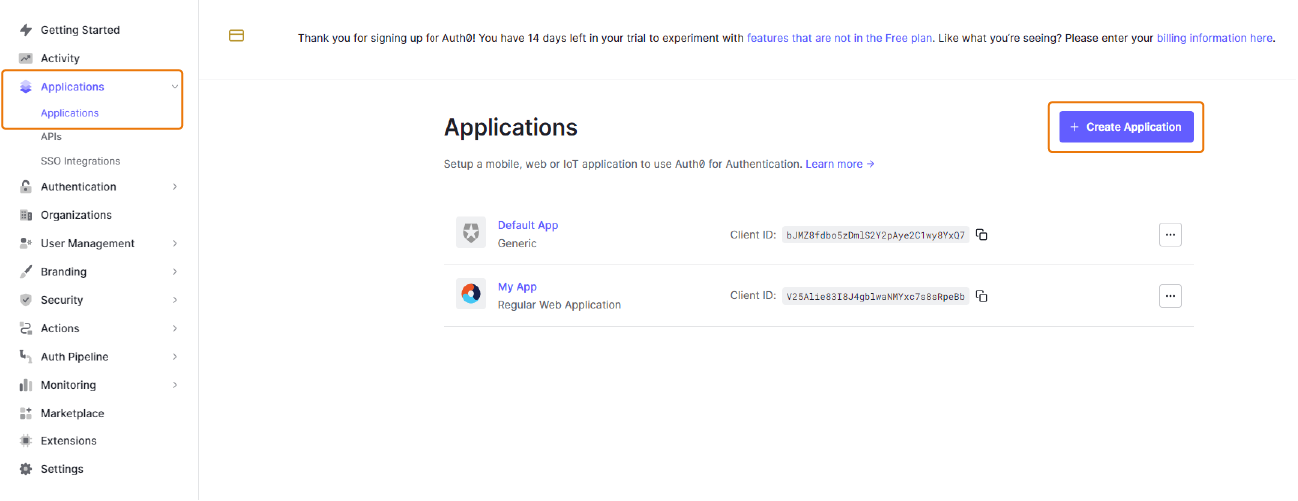
In the navigation on the left, navigate to Applications > Applications.
-
Click Create Application.
-
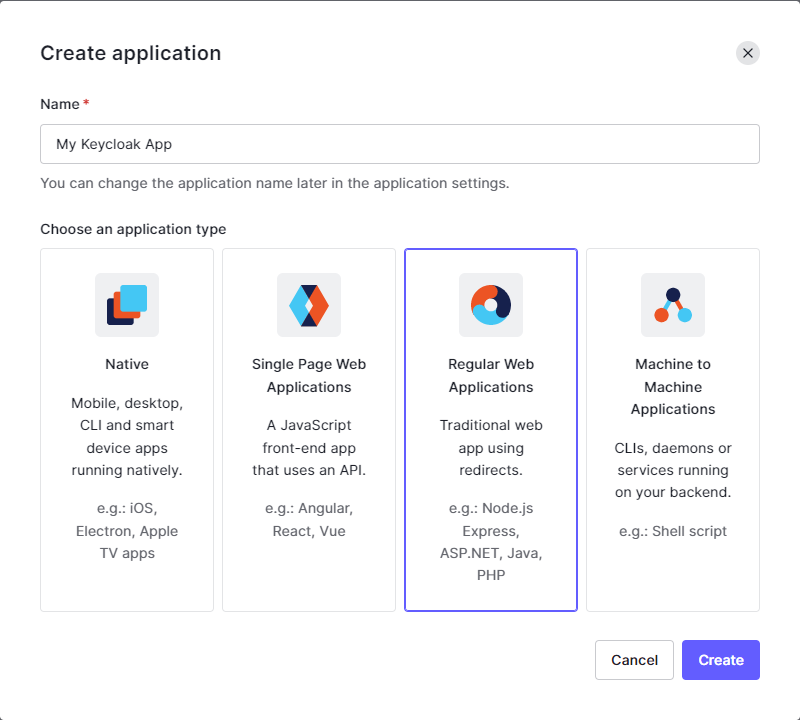
Enter a name and select an application type (e.g. Regular Web Applications).
-
Click Create.
The app is created.
-
Navigate to the Settings tab, there can be found the information for the following steps, which needs to be copied from Keycloak to Auth0 and vice versa.
-
Go to the IEM url and log in using the customer_admin user, or any existing users with access to IAM:
https://<IEM-IP or HOSTNAME> -
Once logged-in select the Identity & Access Management tile in the launchpad.
-
In the navigation on the left, navigate to Identity Providers.
-
From the User-defined section, select OpenID Connect v1.0.
-
Optionally, enter another name in the Alias input field to clearly identify the identity provider.
-
Copy and paste the following 2 URLs to Auth0:
-
Redirect URl in Keycloak to Allowed Callback URLs in Auth0
-
Allowed Web Origins
-
-
Copy and paste the Authorization URL from Auth0 to Keycloak under the Discovery Endpoint Field:
13.1 Make sure the Use discovery endpoint is enabled, if Keycloak can access it, it will import the rest of the endpoints and display a green check icon.
13.2 In case the metadata import failed, copy and paste manually the following endpoints from Auth0 to Keycloak
-
Authorization URL
-
Token URL
-
User Info URL (optional)
-
-
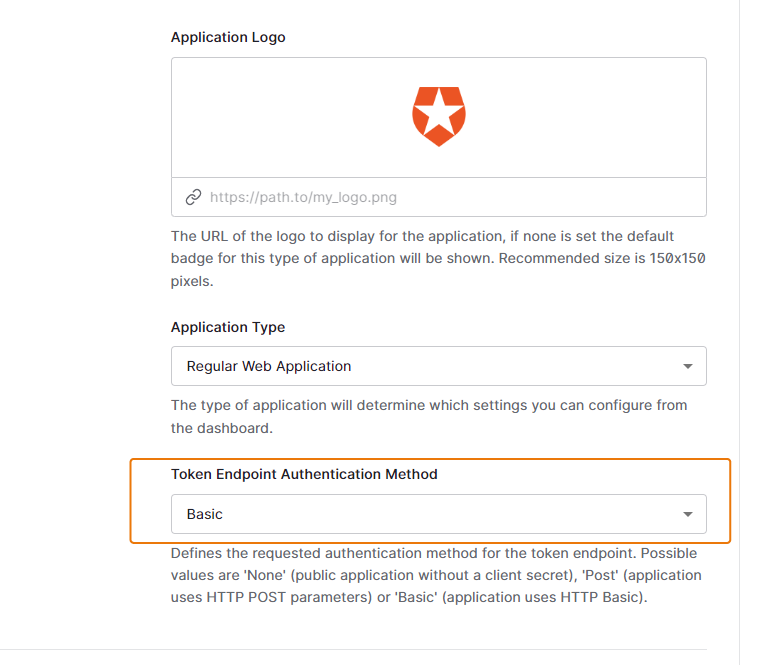
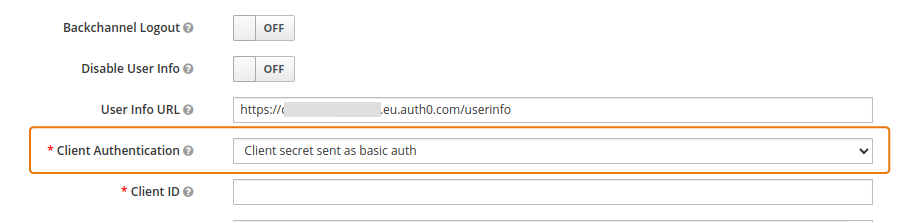
From the Client Authentication drop-down list in Keycloak, select the same value you set as the Token Endpoint Authentication Method in Auth0.
-
Copy and paste the Client ID and Client Secret from Auth0 to Keycloak.
-
Save your application settings in Auth0 and the identity provider settings in Keycloak.
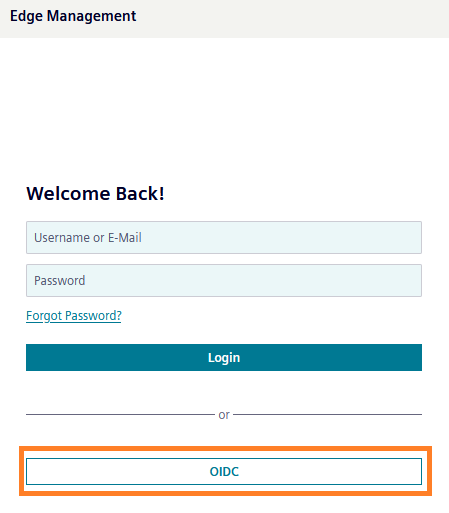
The login option has been added to the login page.
Via SAML
The following step-by-step instructions describe the process of connecting Keycloak to Auth0 using SAML as an example. More information about federation with SAML can be found here.
To connect Keycloak to Auth0 via SAML, proceed as follows:
-
Log into Auth0.
-
In the navigation on the left, navigate to Applications > Applications.
-
Click Create Application.
-
Enter a name and select an application type (e.g. Regular Web Applications).
-
Click Create.
The app is created.
-
Go to the IEM url and log in using the customer_admin user, or any existing users with access to IAM:
https://<IEM-IP or HOSTNAME> -
Once logged-in select the Identity & Access Management tile in the launchpad.
-
In the navigation on the left, navigate to Identity Providers.
-
From the User-defined section, select SAML v2.0.
-
Copy the Open IDP Config URL and paste it into SAML entity descriptor.
-
Copy and paste the following 2 URLs to Auth0:
-
Redirect URl in Keycloak to Allowed Callback URLs in Auth0
-
Allowed Web Origins
-
-
Save your application settings in Auth0 and the identity provider settings in Keycloak.
The login option has been added to the login page.