Device details
On the device details page, you can find all device related information and actions.
Besides basic device information (e.g. name, device type and architecture), the page is structured into the following components:
- Labels
- Installed applications
- System metrics
- Firmware
- Log files
- Commands
- Settings
- Remote Access
- Additional information
NOTICE
For devices that are not onboarded yet, it's possible to download its configuration file.
Labels
With the Labels feature, users can efficiently categorize and organize their devices by assigning custom labels. Users can easily manage these labels by adding or removing them, enhancing their overall device management experience. Additionally, labels will be displayed on the device overview page in both card and list views, providing users with a quick and clear visual reference for each device.

Installed applications
In this tab, all applications that are installed on the device are displayed and the installation of applications can be performed. Several actions (e.g. start, stop, uninstall) and more information (details, logs) can be accessed via a context menu.
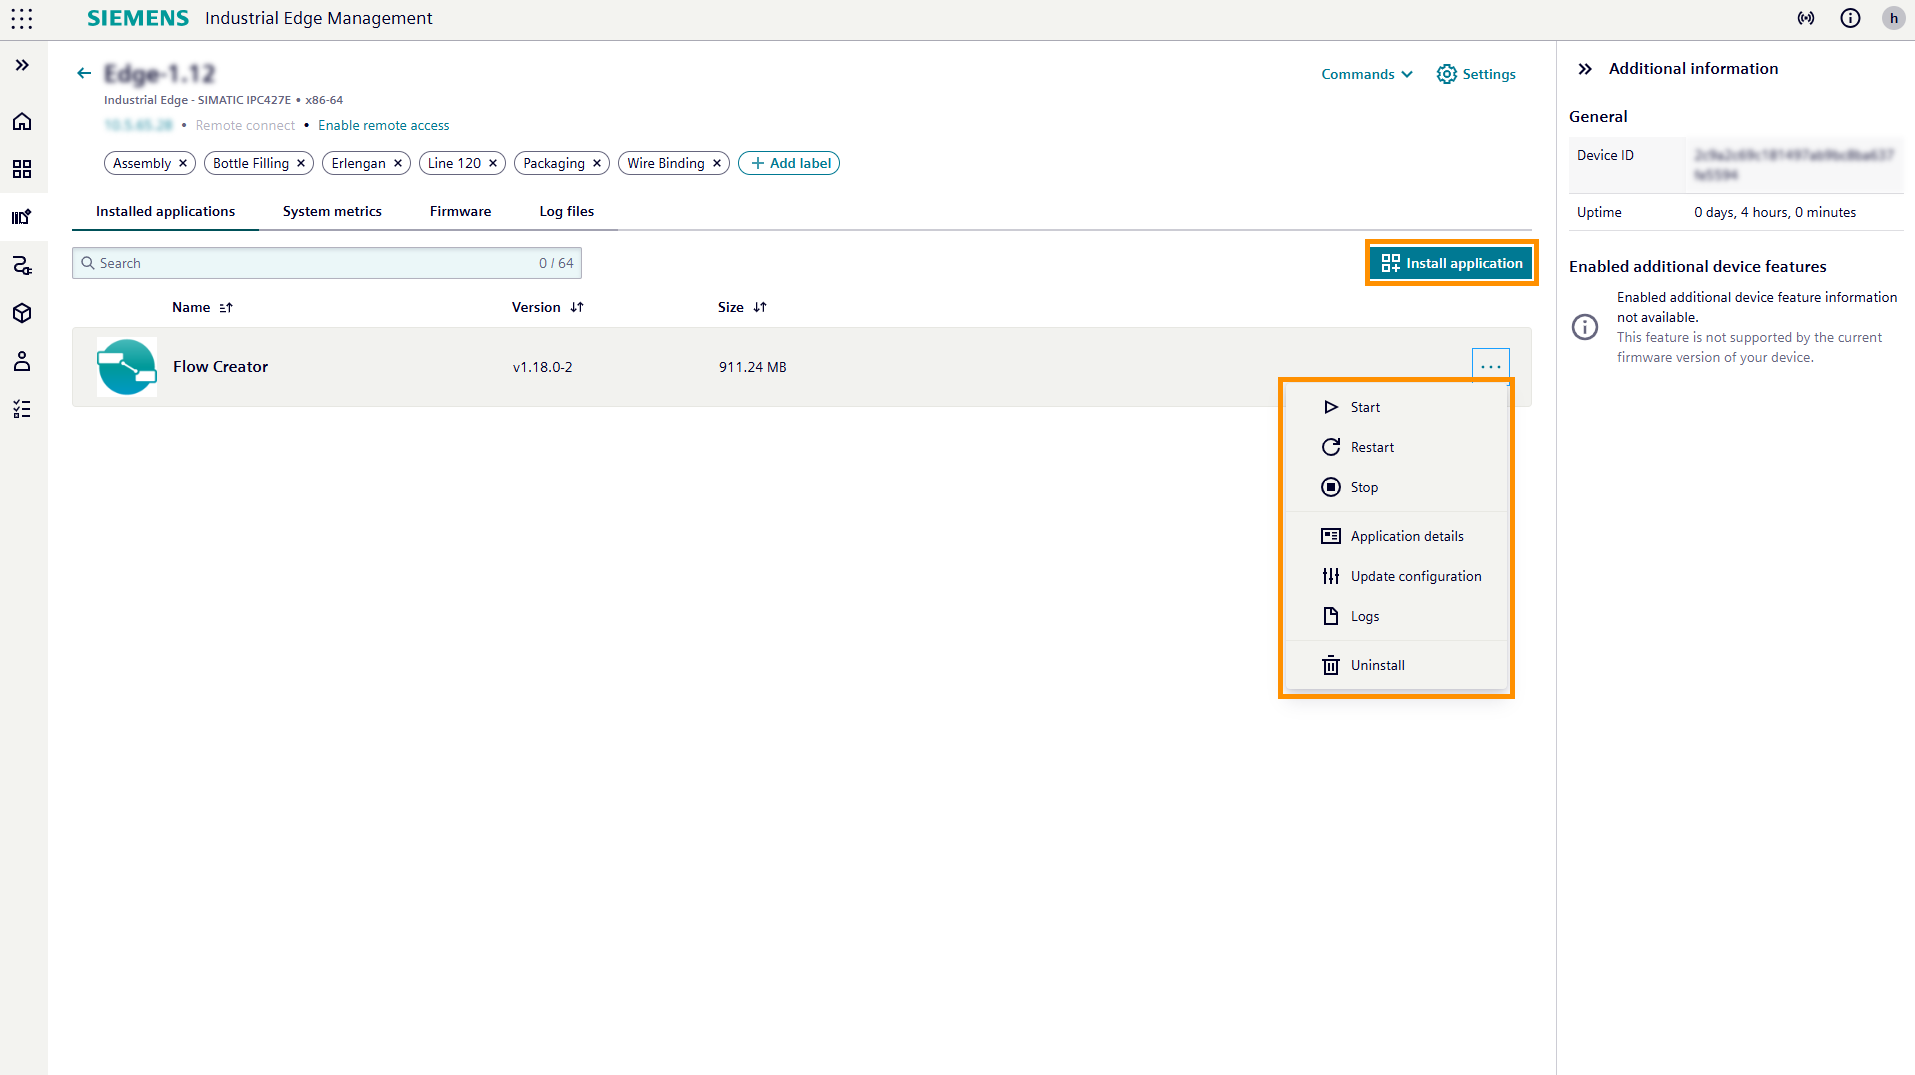
Install application
You can start the device application installation process in this view. Refer to Installation of Device Applications for a detailed description of how to install Device Applications on your Edge Devices.
Further actions and information
- Start, restart and stop: You can start, restart and stop the application.
- Application details: You can access the
Device application detailspage of each application. - Update configuration: You can update configuration for already installed applications.
- Logs: You can access and download the device logs.
- Uninstall: This will uninstall the application from the device.
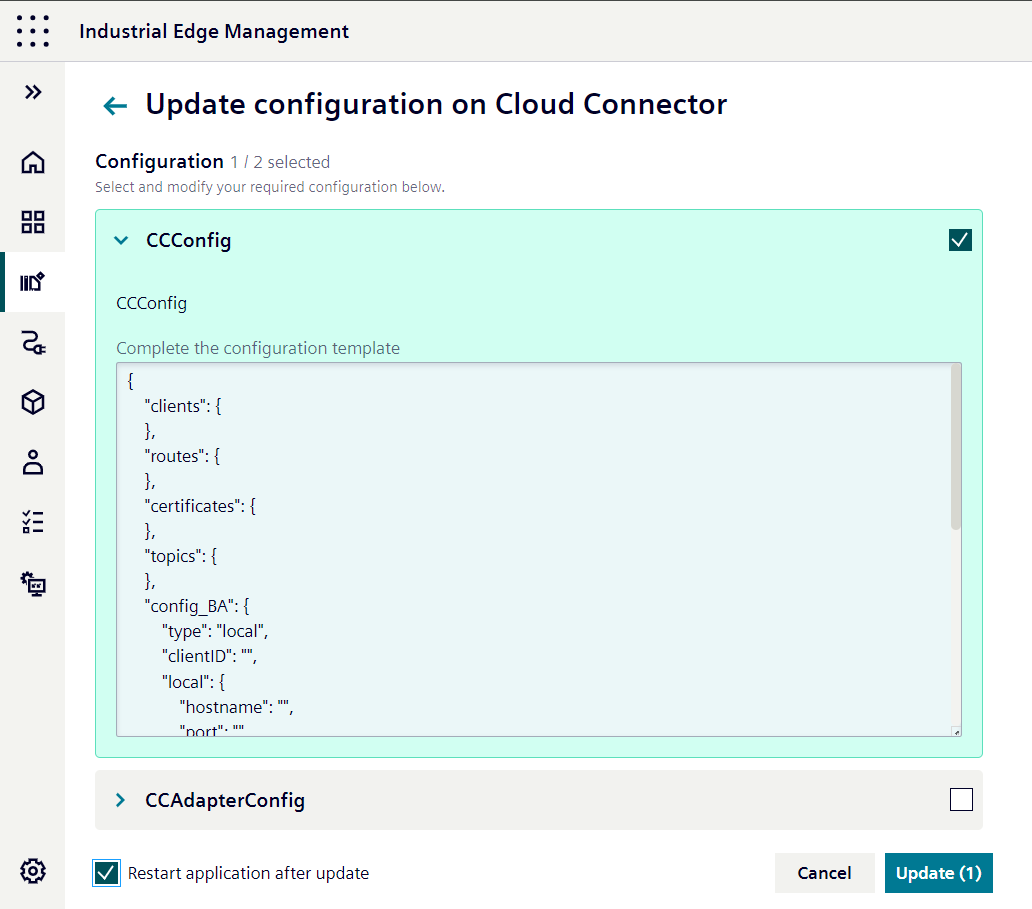
Update configuration
Clicking the Update configuration button opens the update configuration page.
You can edit and select configurations which need to be updated.
Additionally, a checkbox is provided to initiate a restart of the application after the update.
Click the Update button to initiate the update process.
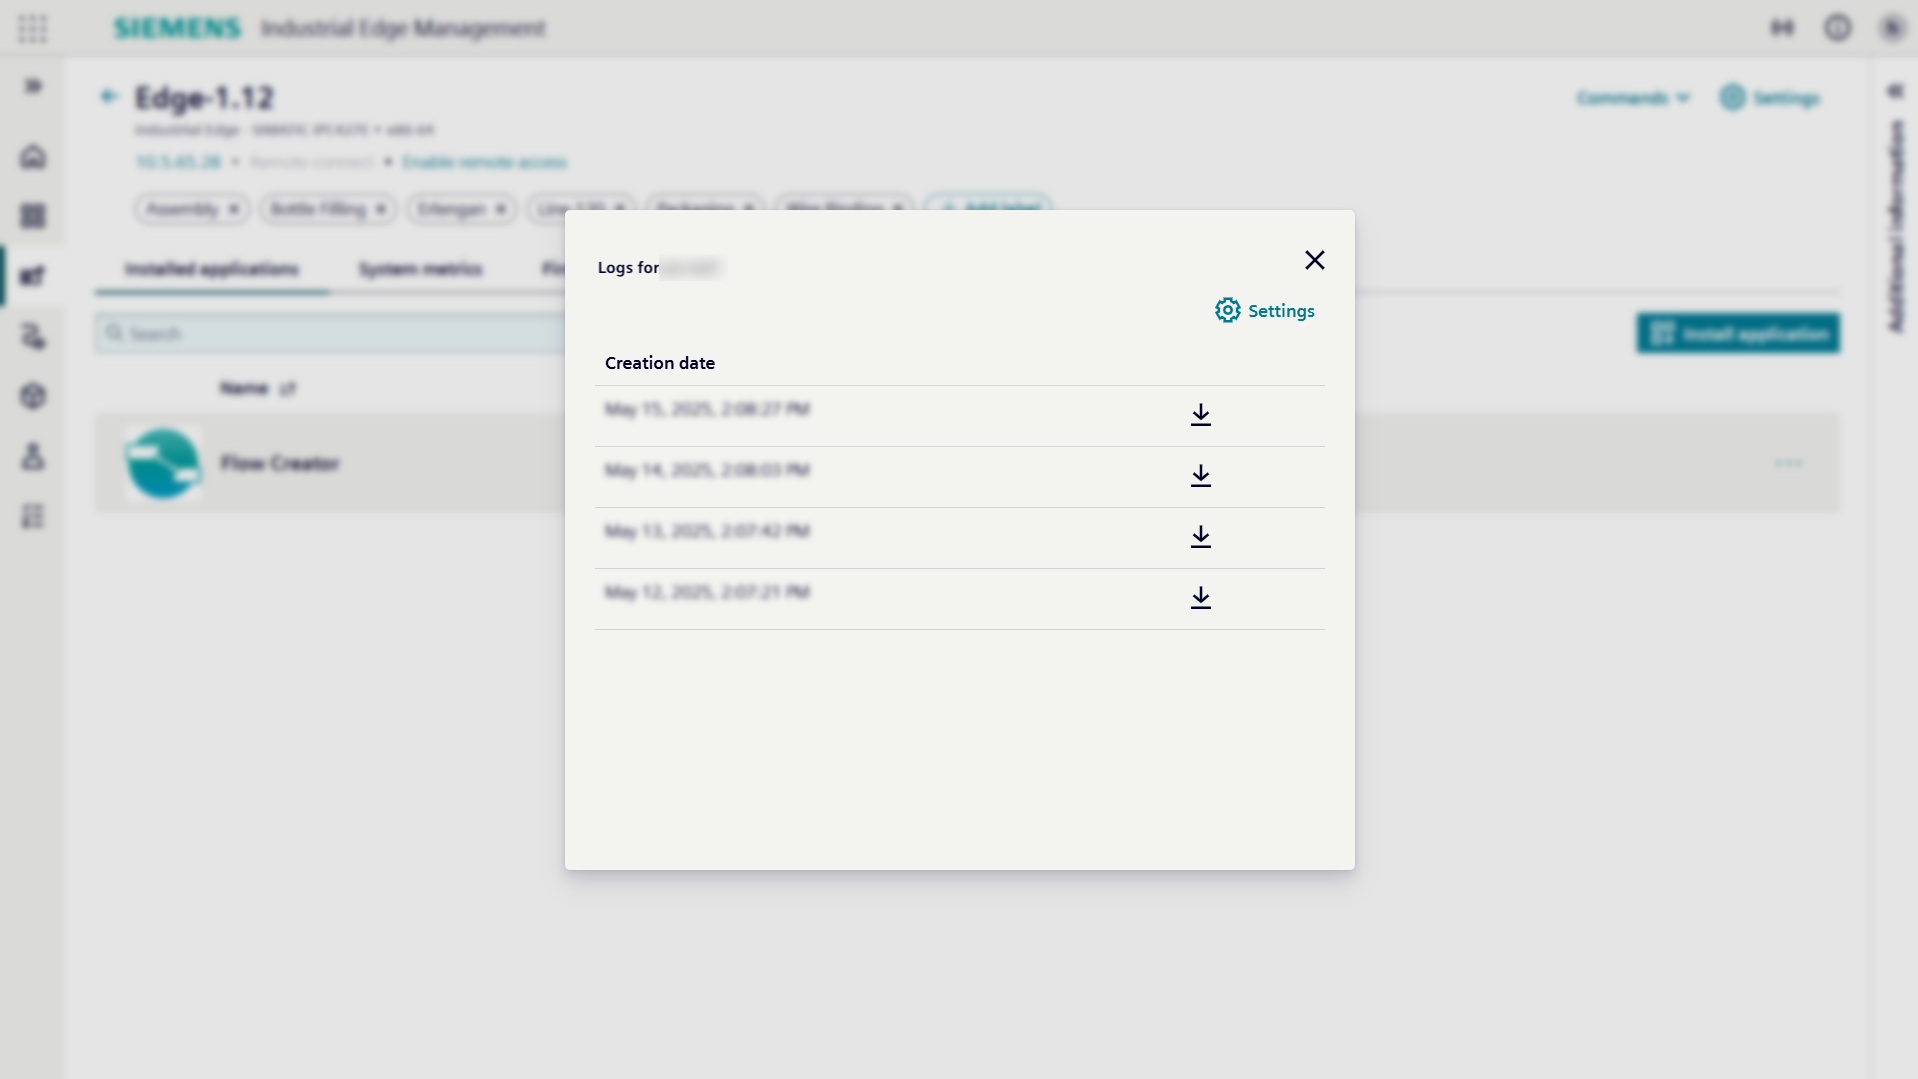
Logs
Clicking the Logs button will open a pop-up window in which you can access and download the logs created by your device.
System metrics
The system metrics include the device's consumption of Memory, CPU and Storage to easily identify the current computing utilization of the device.
Gauge indicators
The color of the gauge is based on the threshold point set on the device.
- Green: Indicates that the average or peak is within the normal range.
- Yellow: Indicates that the average or peak has reached a warning level.
- Red: Indicates that the average or peak has reached a critical level.
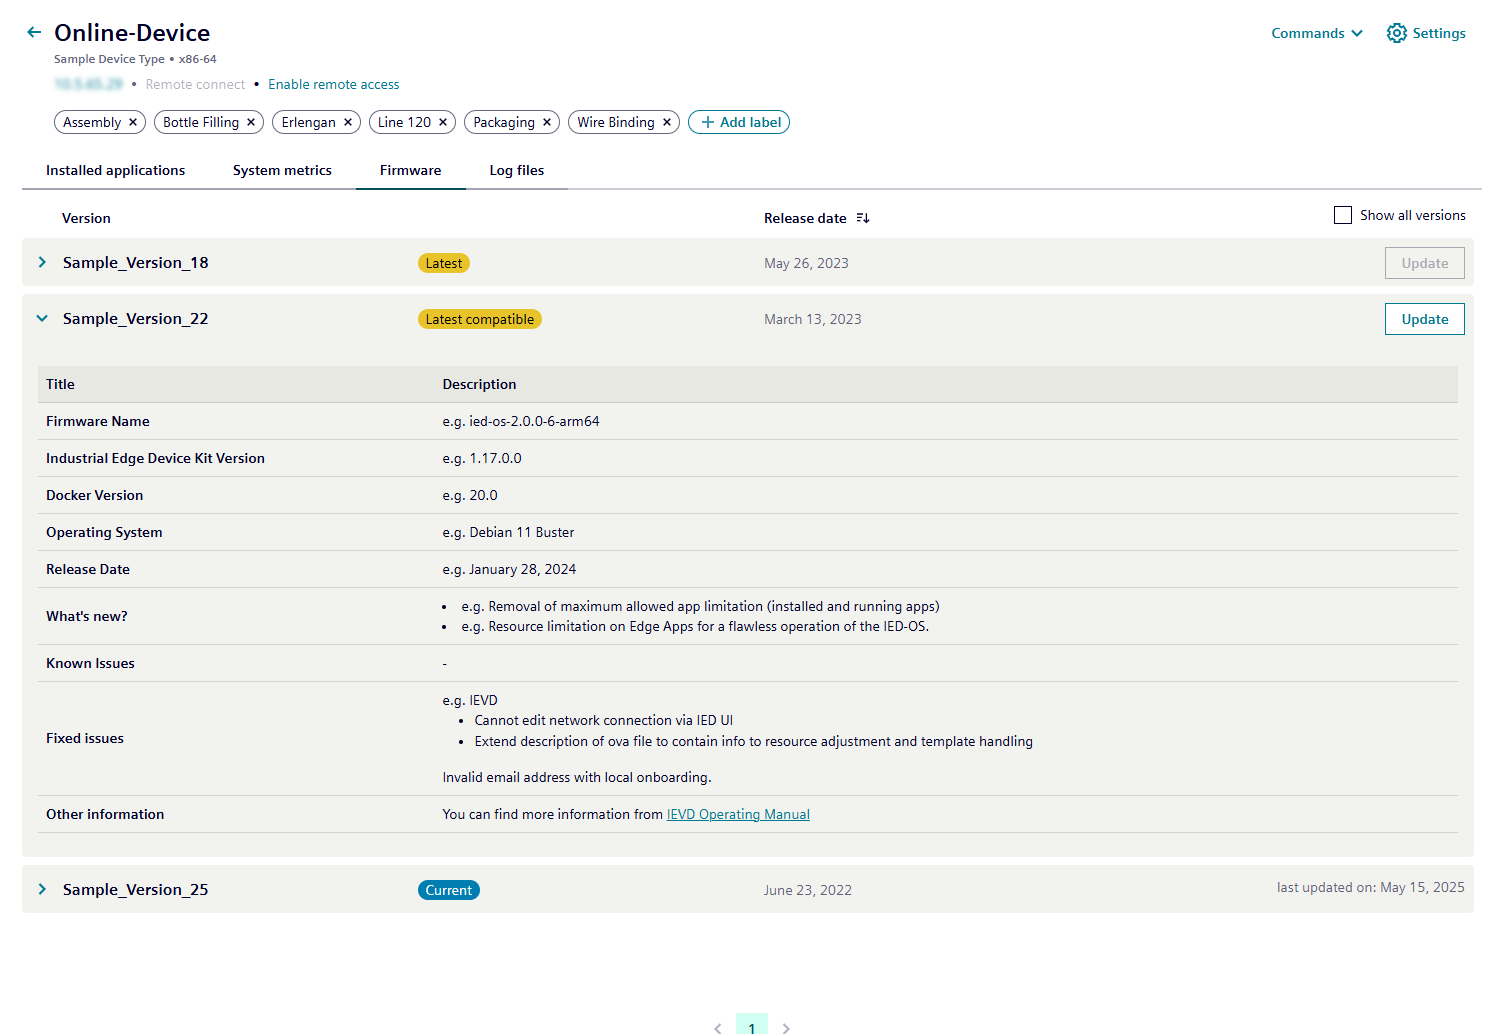
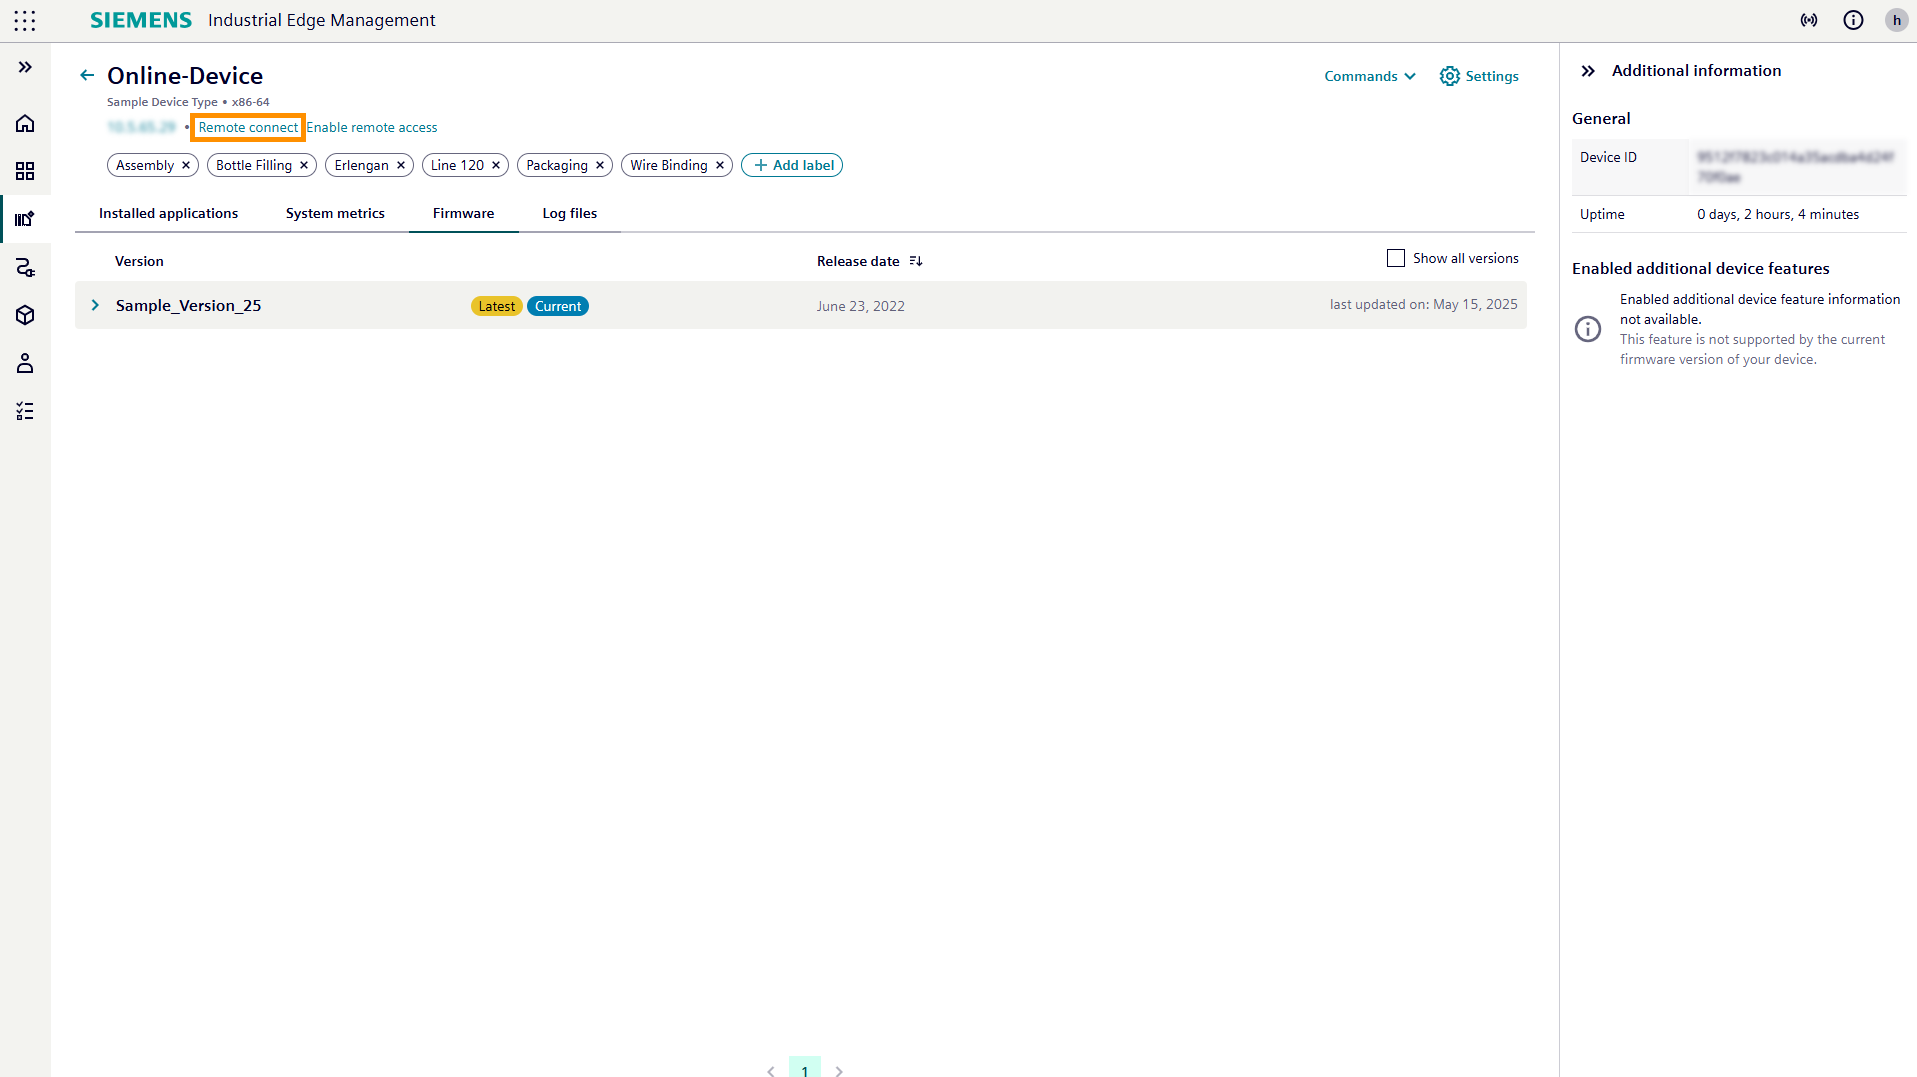
Firmware
In the firmware tab, the device firmware can be updated.
To initiate an update, click Update.
The following information is available:
- Current firmware version: Displays the version currently installed on the device.
- Latest compatible firmware version: Shows the most recent version that is compatible with the device.
- Latest available firmware version: Indicates the newest firmware version available.
By default, the Show all versions option is unchecked when the page is opened.
Firmware versions are sorted by release date, with the most recent version displayed first.
| Info | Description |
|---|---|
| Current | Current firmware release version on device. |
| Latest Compatible | The most recent published firmware release version that the device can be updated to. |
| Latest | The newest firmware release version published for the device type associated with the onboarded device. |
| Last Updated At | The date when the device was last updated. |
| Release Date | The date when the firmware release was published. |
Upon selecting the Show all versions option, all versions are displayed. Releases can be reordered according to their release dates. Other versions can be accessed using the pagination buttons at the bottom of the page.
Release notes for the exact firmware version being updated to can be accessed, providing detailed information about new features and fixes.
When a firmware update is initiated, a confirmation modal is displayed. Upon confirmation, the update begins.
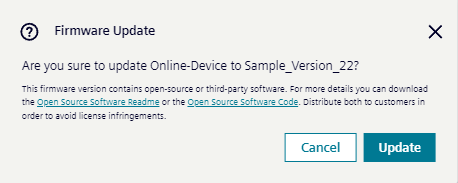
NOTICE
Do not perform any other actions during the update, as this could cause the IE device update to fail.
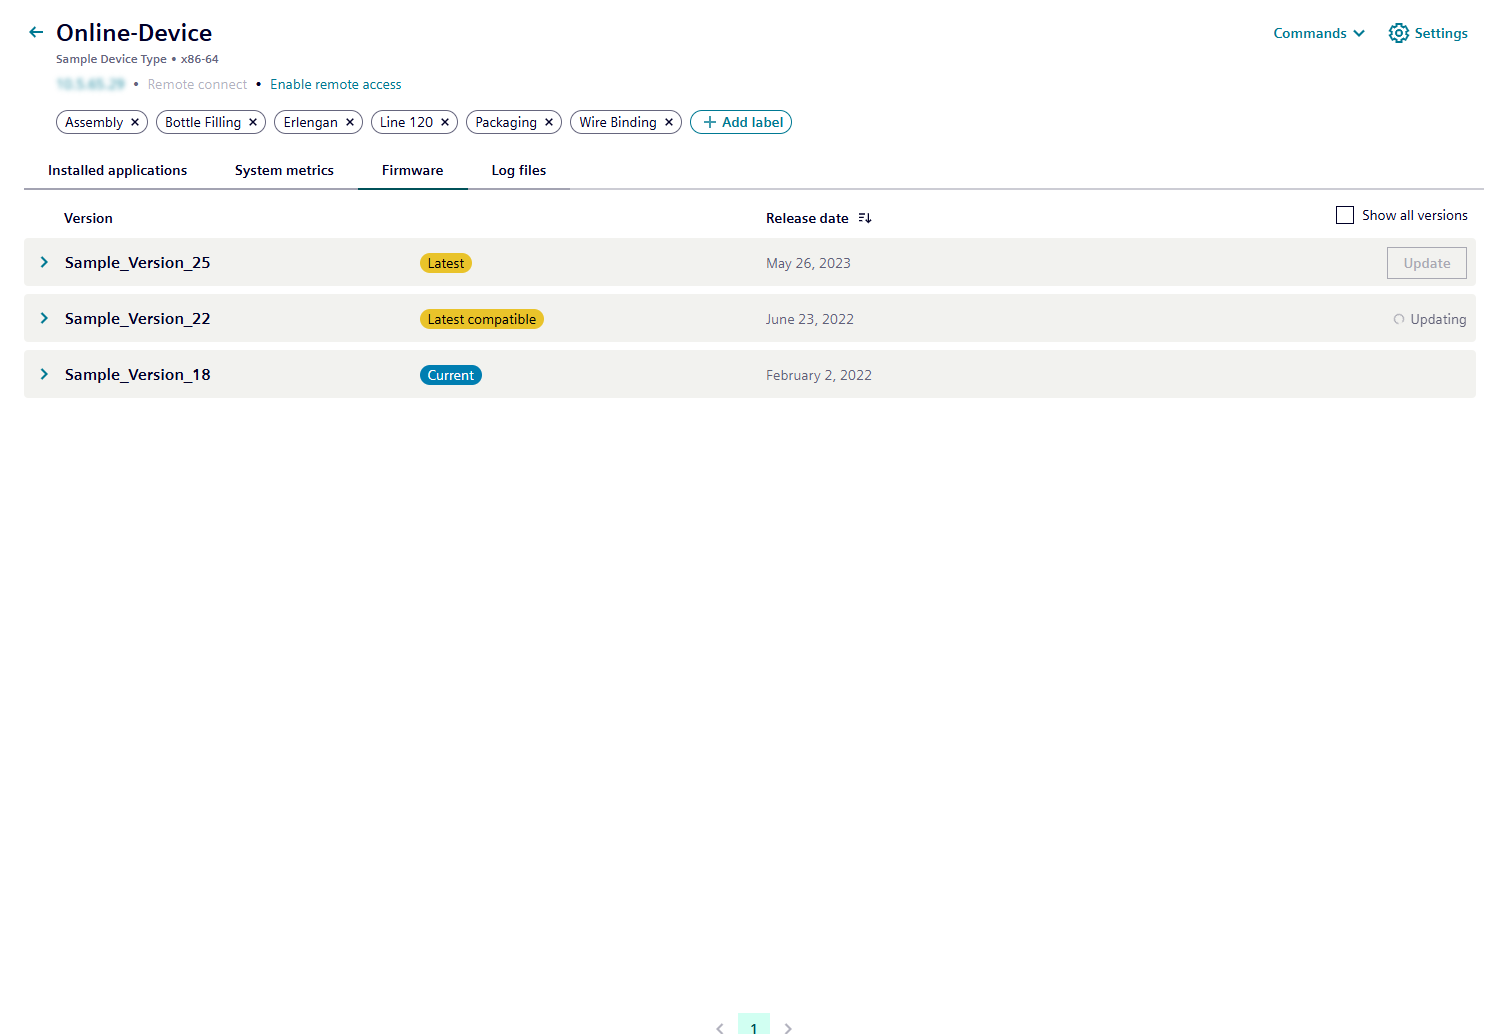
Once the update begins, the relevant firmware release is downloaded to the IEM.

After the download is complete, the device update process starts.
After all updates have been completed, when a device is up-to-date, both the Current and Latest tags are visible, indicating it is on the most recent firmware release for its device type.
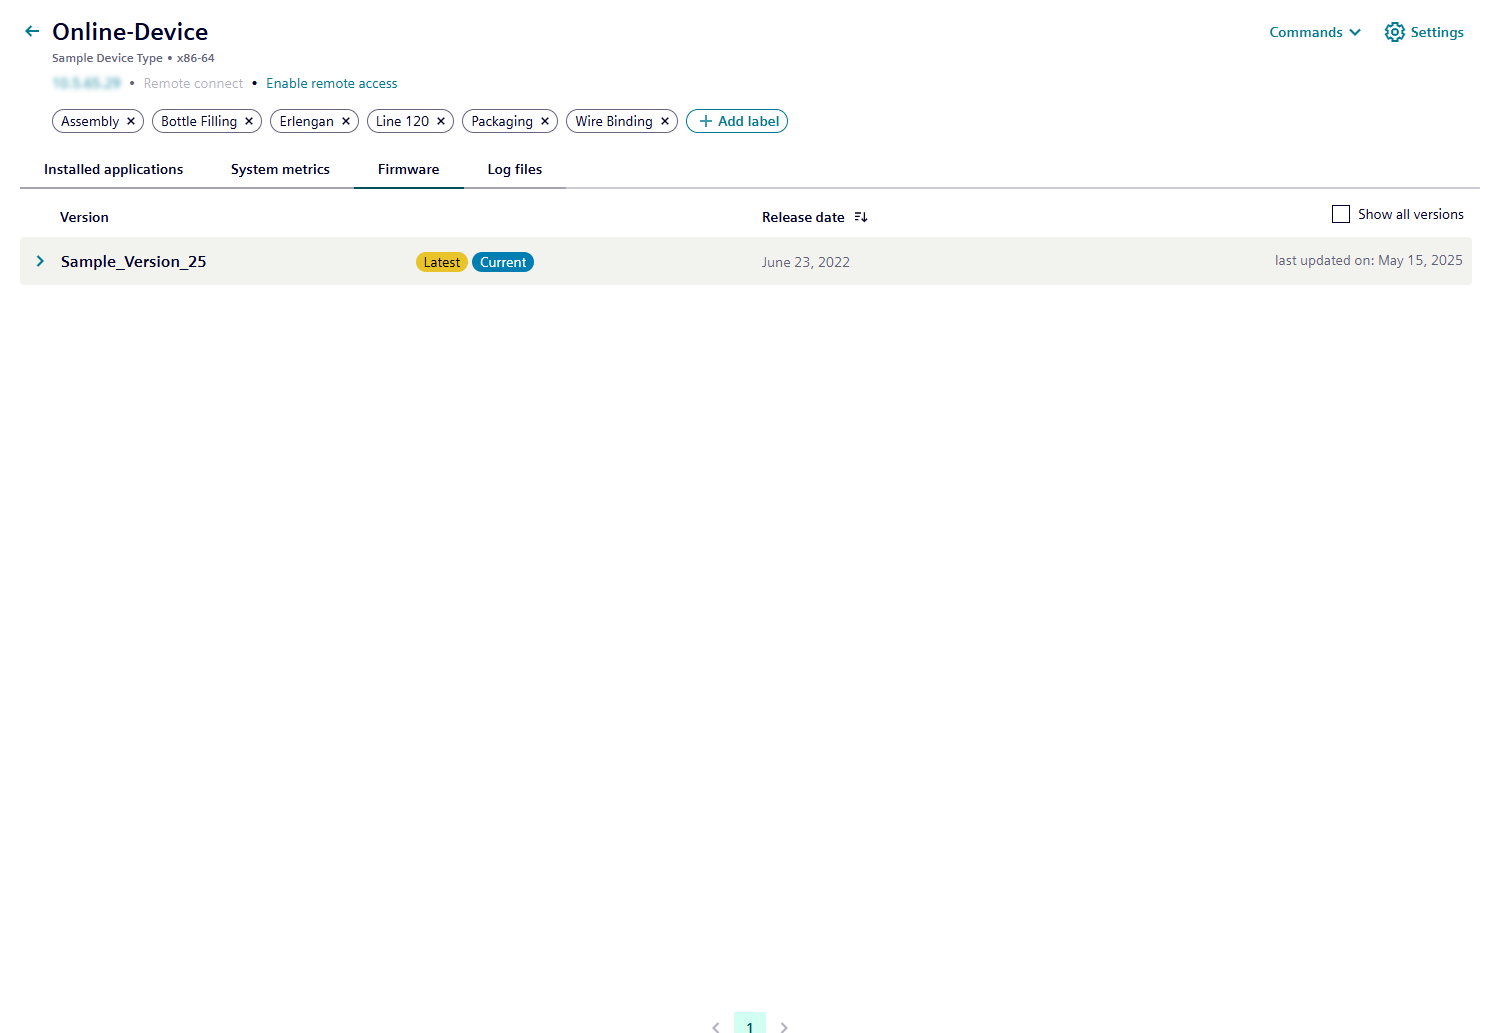
Upon succesful firmware update, a notification pops up.
Log files
In the log files tab, the created device logs are displayed and downloadable. The log streaming functionality can be enabled or disabled in the device settings.
Commands
Industrial Edge devices can be shut down or restarted by operators.
Clicking on Commands allows you to perform a shutdown or a restart.
You need to confirm the command execution.
The status of the command can be tracked in the respective job status.
NOTICE
Starting with version 1.23.0 of the Industrial Edge Device Kit, the device commands will be applied immediately. However, confirmation is still required to prevent mistakes.
Remote Access
Industrial Edge devices can be controlled via a remote connection, even one created from outside their defined security perimeter.
By clicking on the Enable remote access option, a remote connection is established from the Industrial Edge device to the Industrial Edge Management system. A success message will inform you about the triggering of the remote connection setup process. You can monitor the status of this job in the job overview window.
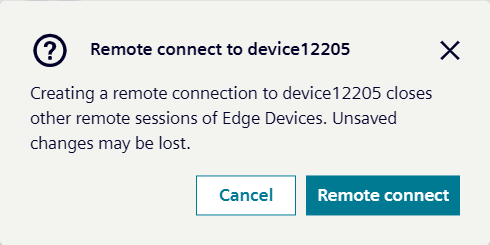
Once the remote connection is successfully established, you can initiate the remote session by clicking on the Remote connect button. This will open a new browser tab and display the login page for the Industrial Edge device. The default time for remote access is 2hours.
You may have remote access enabled for many devices, but you can only connect remotely to one device at a time using your browser. To access two devices simultaneously, please use another browser or the incognito mode. Connecting remotely to one device while having another session open will trigger the following warning.
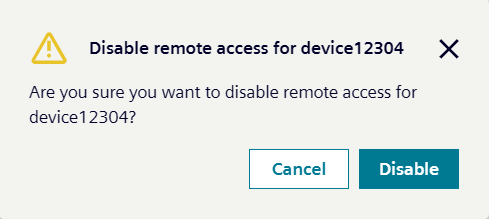
You can disable the remote access at any time by clicking on Disable remote access.
A confirmation box will appear to avoid disabling by mistake.
NOTICE
Remote Access With remote access enabled, if a K8s IEM becomes inaccessible, it will take up to 7 minutes to connect via remote access once the IEM is connected to the IE Device.With remote access enabled, if a non-K8s IEM becomes inaccessible, it will take up to 15 minutes to connect via remote access once the IEM is connected to the IE Device.
NOTICE
When changing the network configuration on an IE Device (e.g., switching from DHCP to static IP, or vice versa), the remote access connection is temporarily interrupted while the device's network layer restarts. The "Remote Connect" button may appear disabled if the IEM page is refreshed. This happens because the operation is not yet finished. Once completed, the button becomes available again.
NOTICE
Next-generation firewalls (NGFs) Remote access to Industrial Edge Devices is established via a WebSocket connection with an overlay SSH channel. This enables secure communication and remote management of devices. Next-generation firewalls (NGFWs) are capable of detecting and inspecting this traffic, potentially blocking it based on protocol identification and security policies. If you are using an NGFW, ensure that TCP profile is used for this traffic to allow direct tunneling. If an SSL profile is applied, make sure that SSH traffic is explicitly allowed within the profile. WebSocket traffic is permitted to avoid disconnection issues. Recommendation Review firewall logs to verify if the traffic is being blocked. Adjust settings accordingly to prevent interference with remote access functionality.
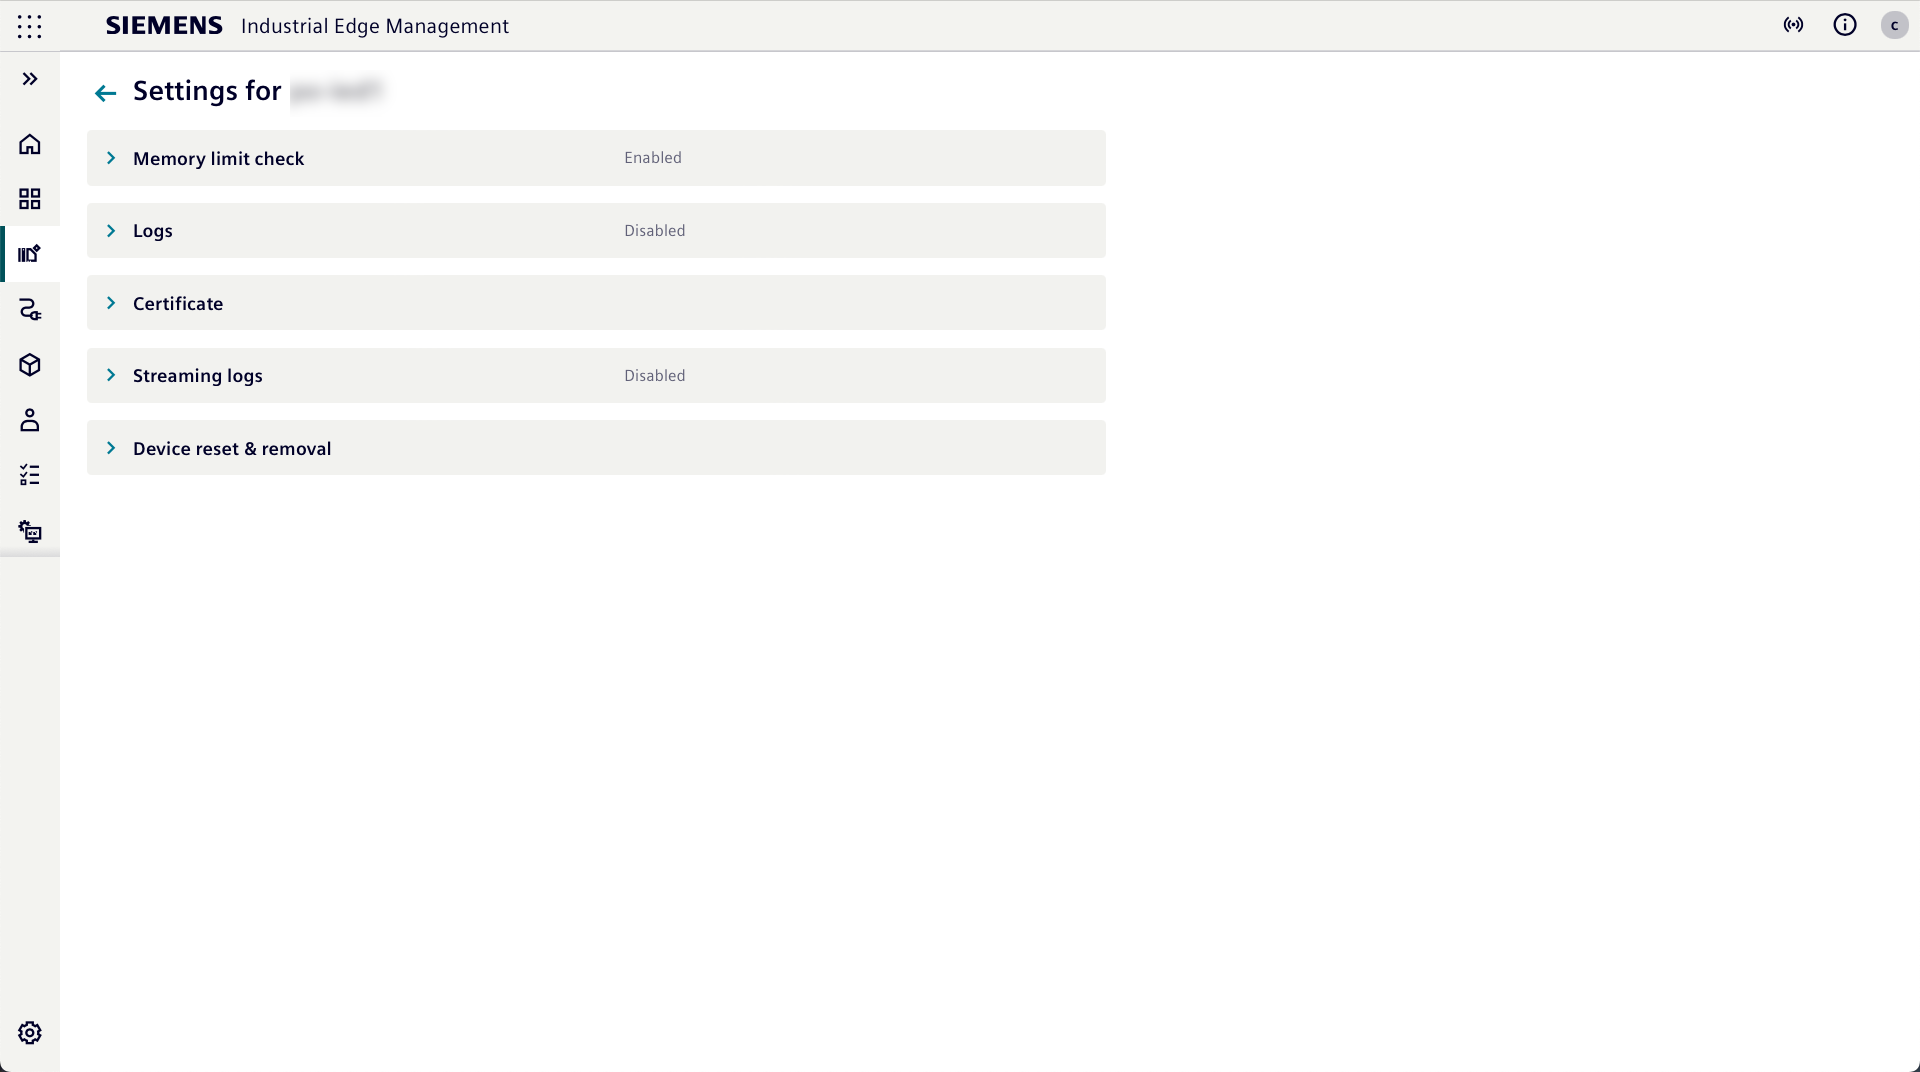
Settings
Clicking on Settings opens up the device specific settings that can be edited:
- Memory limit check
- Logs
- Certificate
- Streaming logs
- Device reset & removal
For more information regarding Memory limit check, Certificate and Streaming logs, refer to the detailed settings chapters below.
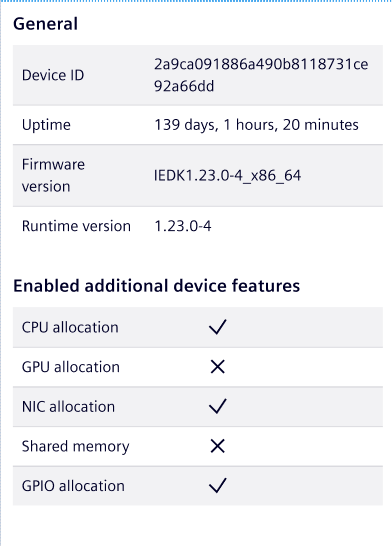
Additional information
In this section, additional information like the device ID, uptime, firmware version and the runtime version is displayed. Furthermore, you can identify which additional device features are enabled or disabled:
- CPU allocation indicates that the
cpu-resource-pluginhas been enabled or disabled on the device - GPU allocation indicates that the
gpu-resource-pluginhas been enabled or disabled on the device - NIC allocation indicates that the
network-resource-pluginhas been enabled or disabled on the device - Shared memory indicates that the
shared-memory-pluginhas been enabled or disabled on the device