Creating a Layer 2 network access
Some Edge Apps need to communicate with automation devices via automation protocols, such as Profinet, DCP and LLDP. That means, these Edge Apps require a Layer 2 (L2) network access. This Layer 2 network access must be used only for communication with automation devices, it is not designed to provide communication between app containers. For communication between app containers, standard app container communication means must be used.
Layer 2 network access in a docker-compose.yml
- Connect container to a network with name
zzz_layer2_net1. - Specify an network
zzz_layer2_net1from typeexternaland the namezzz_layer2_net1. - Both names must be the same.
If container-container communication is required, e.g. two services in an app, you have to define an extra network (e.g. a Docker Bridge network).
You can find further information about networking in a docker compose on the internet.
Procedure via file import
-
Add version to an IE App.
-
To import a customized YAML file, click
Import YAML fileand select the file from your local system.
The network name of the service must be the same as the network name of the external network. Use the namezzz_layer2_net1. -
To review the content of the YAML file, click
Review.
The sectioncap_addis only needed, if the service needs capabilities.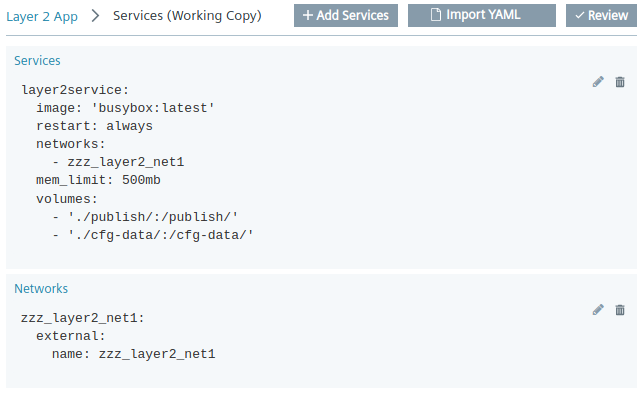
Procedure via configuration dialogs
-
Add version to an IE App.
-
Assign a service and image name in the Configuration Page.
-
Set at least 5 MB as memory limit in the System Page.
-
To open the dialog
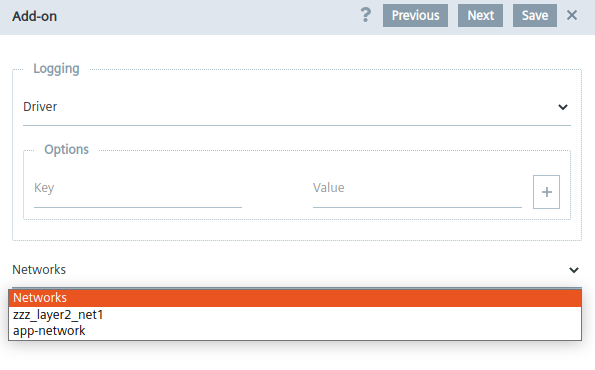
Networks, clickAdd App-level Configurationand selectNetworks. -
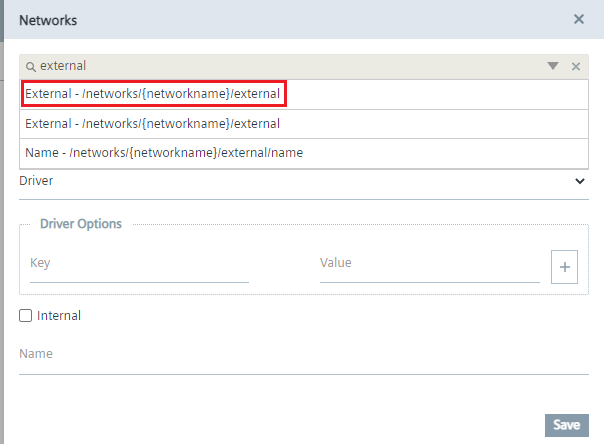
To generate a Layer 2 network access, fill in the dialog as follows:
- Search
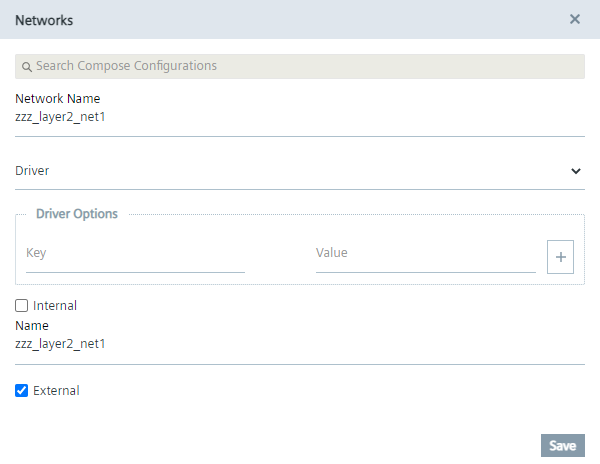
externaland select the first item. - Enter
zzz_layer2_net1toNetwork Name. - Enter the same name
zzz_layer2_net1toName.
- Search
-
To confirm the entries, click
Save. -
To generate a network for communication between containers, click
Add App-level Configurationand fill in the dialog as follows:- Enter a name to
Network Name. The name of the network must come beforezzz_layer2_net1in the alphabet. - Deactivate the checkbox
External.
- Enter a name to
-
Select the networks from the drop-down menu
Networksin the Add-on page.
-
To confirm the changes, click
Save. -
To review the content of the configured YAML file, click
Review.
Example for the structure of the file: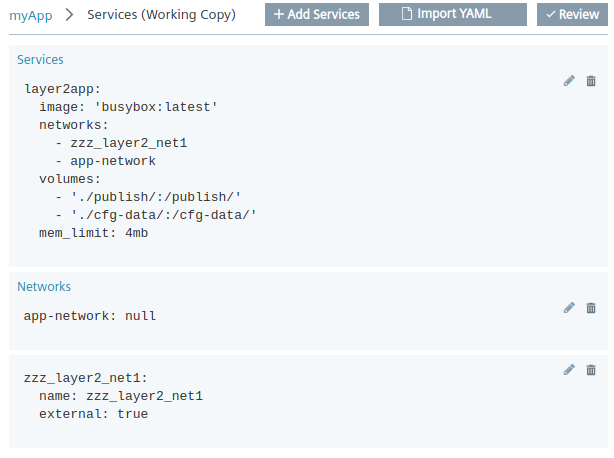
NOTICE
Adding capabilities
If an app service needs additional capabilities, you must import the completed YAML file with the required capabilities via the Import YAML button.
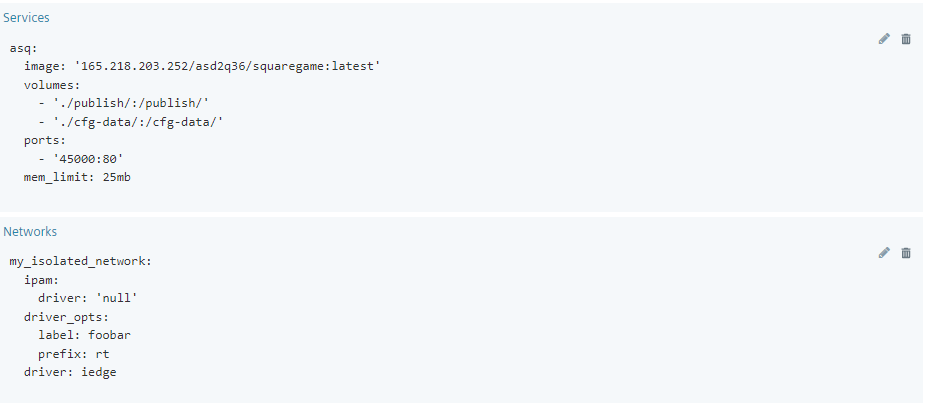
Network Interface Allocation (NIC) in a docker-compose.yml
A network interface is assigned exclusively to the application instance on supporting devices. The exact NIC is chosen by the device operator. The isolated NIC will be invisible to the rest of the system. It allows the application to have more predictable communication over the network. This is particularly useful for applications that require real-time capabilities.
-
Add version to an IE App.
-
Assign a service and image name in the configuration page.
-
Set at least 25 MB as memory limit in the system page.
-
To open the dialog
Networks, clickAdd App-level Configurationand selectNetworks. -
To generate a NIC network access, fill in the dialog as follows:
- Enter
my_isolated_networktoNetwork Name. - Select the
iedgefrom the drop-down menuDriver.
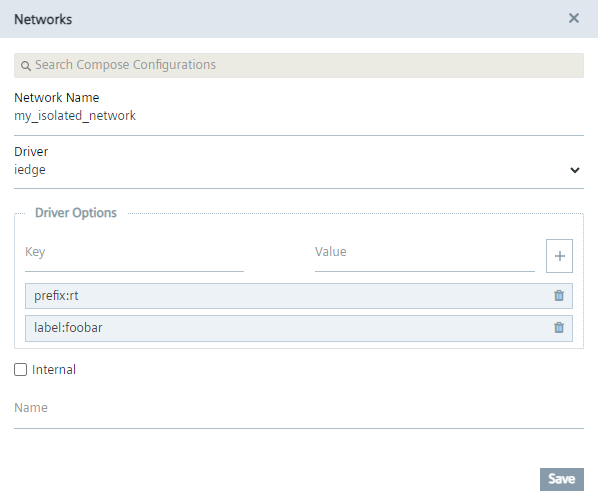
- Enter
-
To confirm the entries, click
Save. -
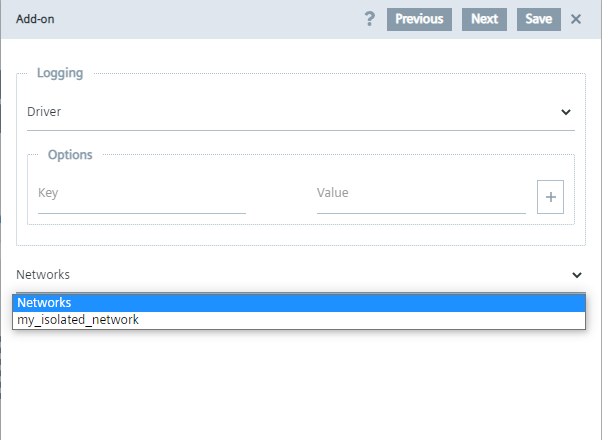
Select the networks from the drop-down menu
Networksin the Add-on page.
-
To confirm the changes, click
Save. -
To review the content of the configured YAML file, click
Review.
Example for the structure of the file: