Create development environment
You will need to install the downloaded ISO image of Ubuntu on your machine or virtual machine.
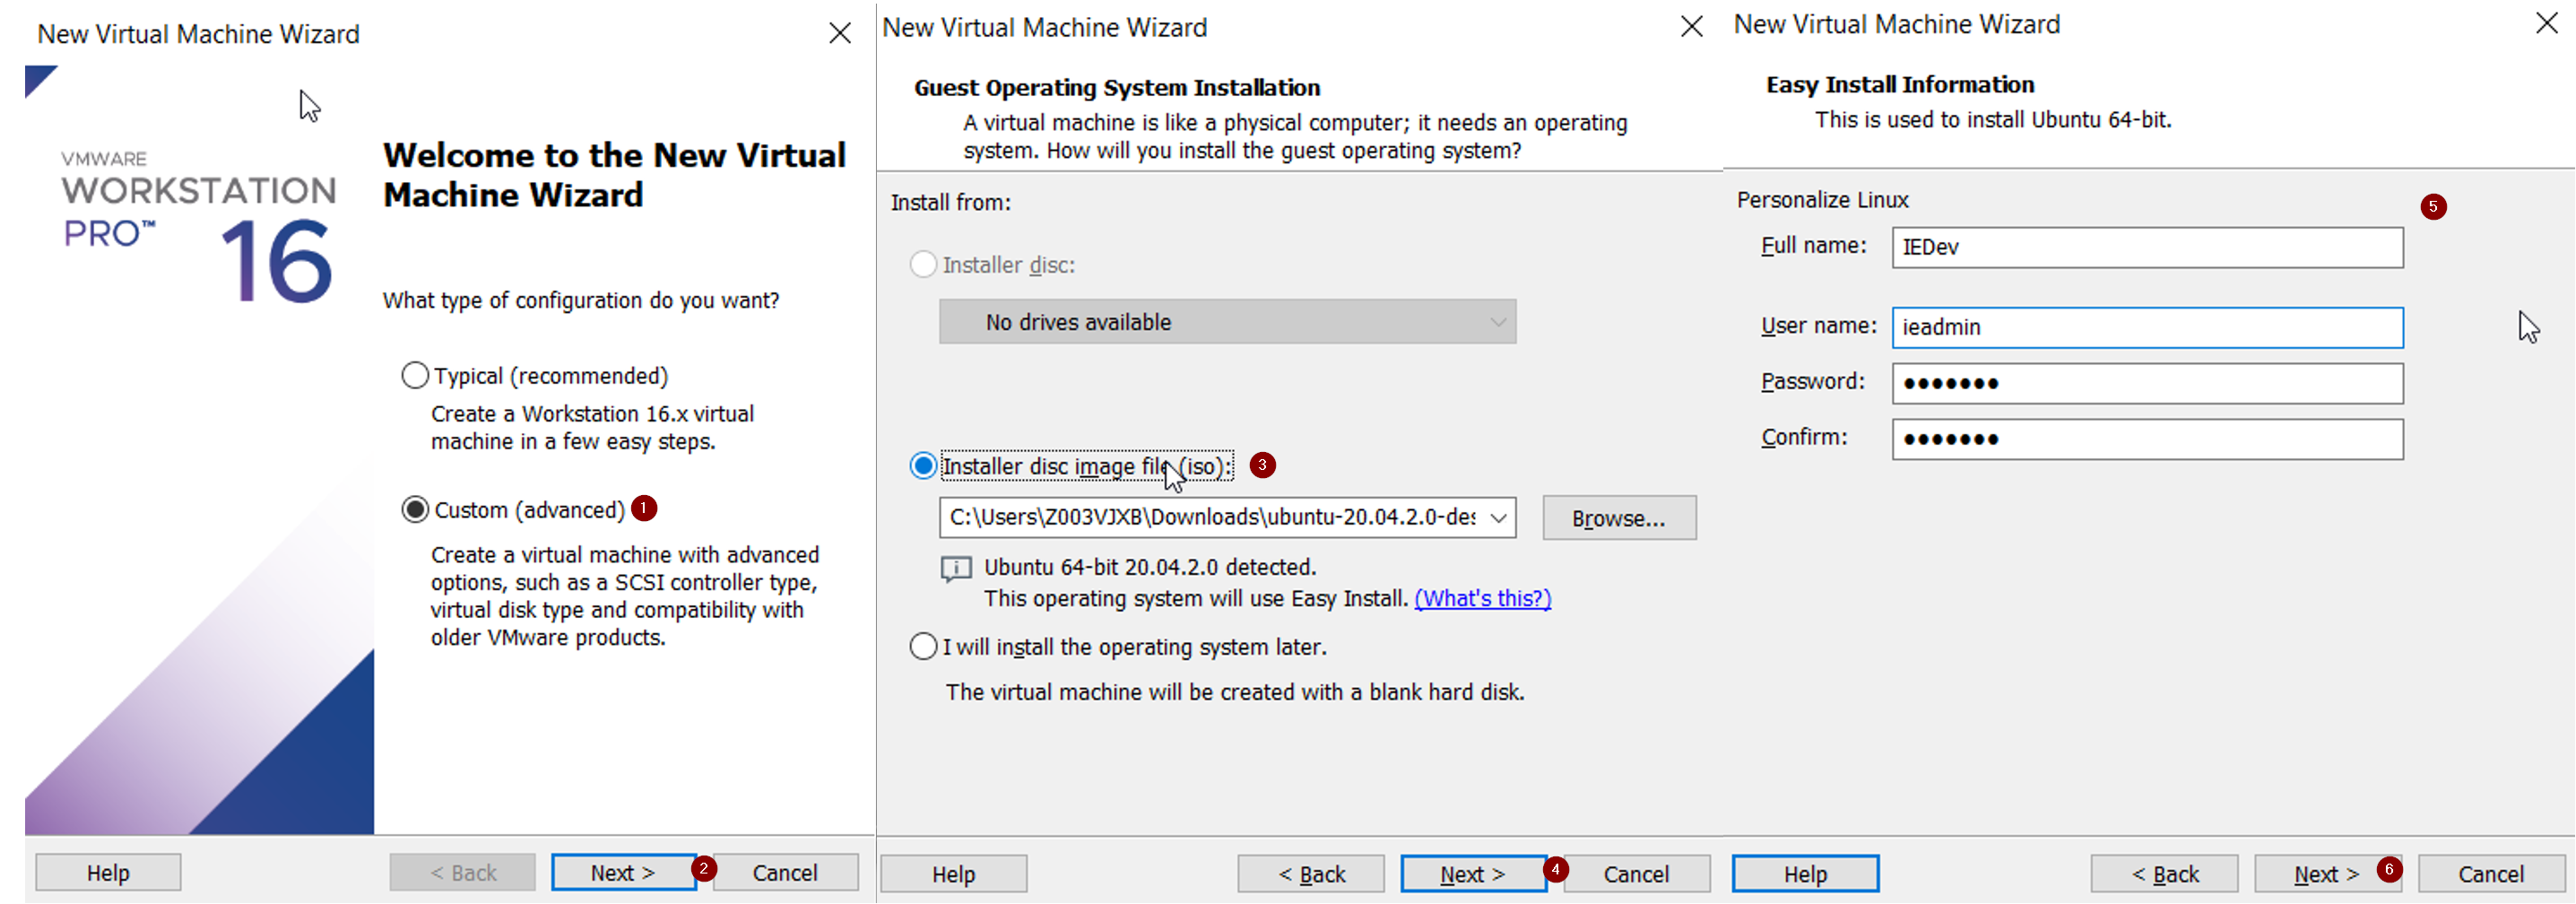
First, start the VMware Workstation app on the computer. Then click on 'File → New Virtual Machine' in the menu bar on the Workstation. A configuration dialog will open.
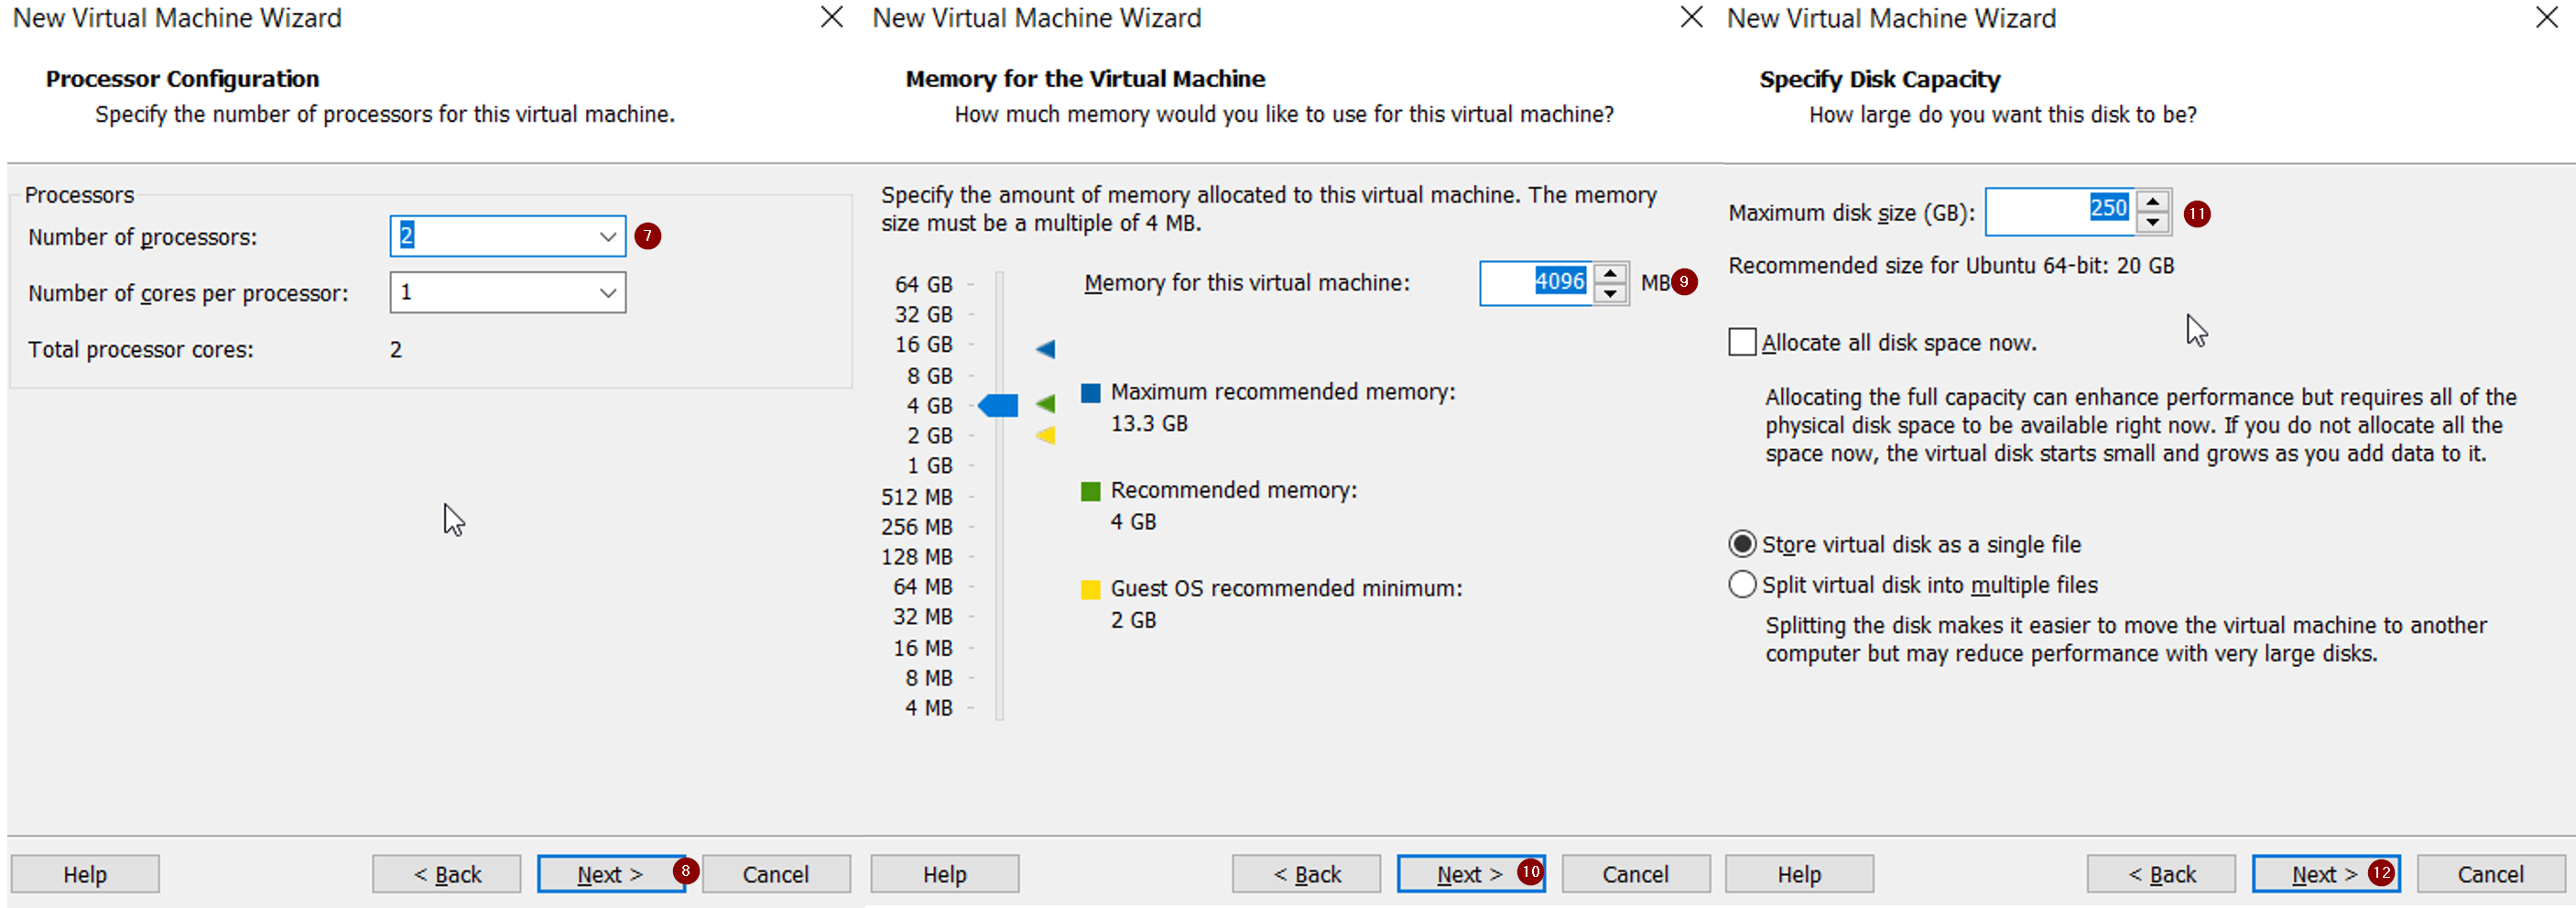
The most important steps are shown in the figures Create Ubuntu Development VM - Part 1 and Create Ubuntu Development VM - Part 2. For all the steps that are not shown, please use the default recommendations.
Steps for setting up the VM environment
- Select Custom to view advanced configuration options
- Click Next
- Select the downloaded ISO file for Ubuntu in your file system
- Click Next
- Enter your credentials and make a note of them (Login)
- Click Next
- Configure the processors according to your requirements
- Click Next
- Set the RAM of the virtual machine to 4GB
- Click Next
- Set disk space to 250GB
- Click Next


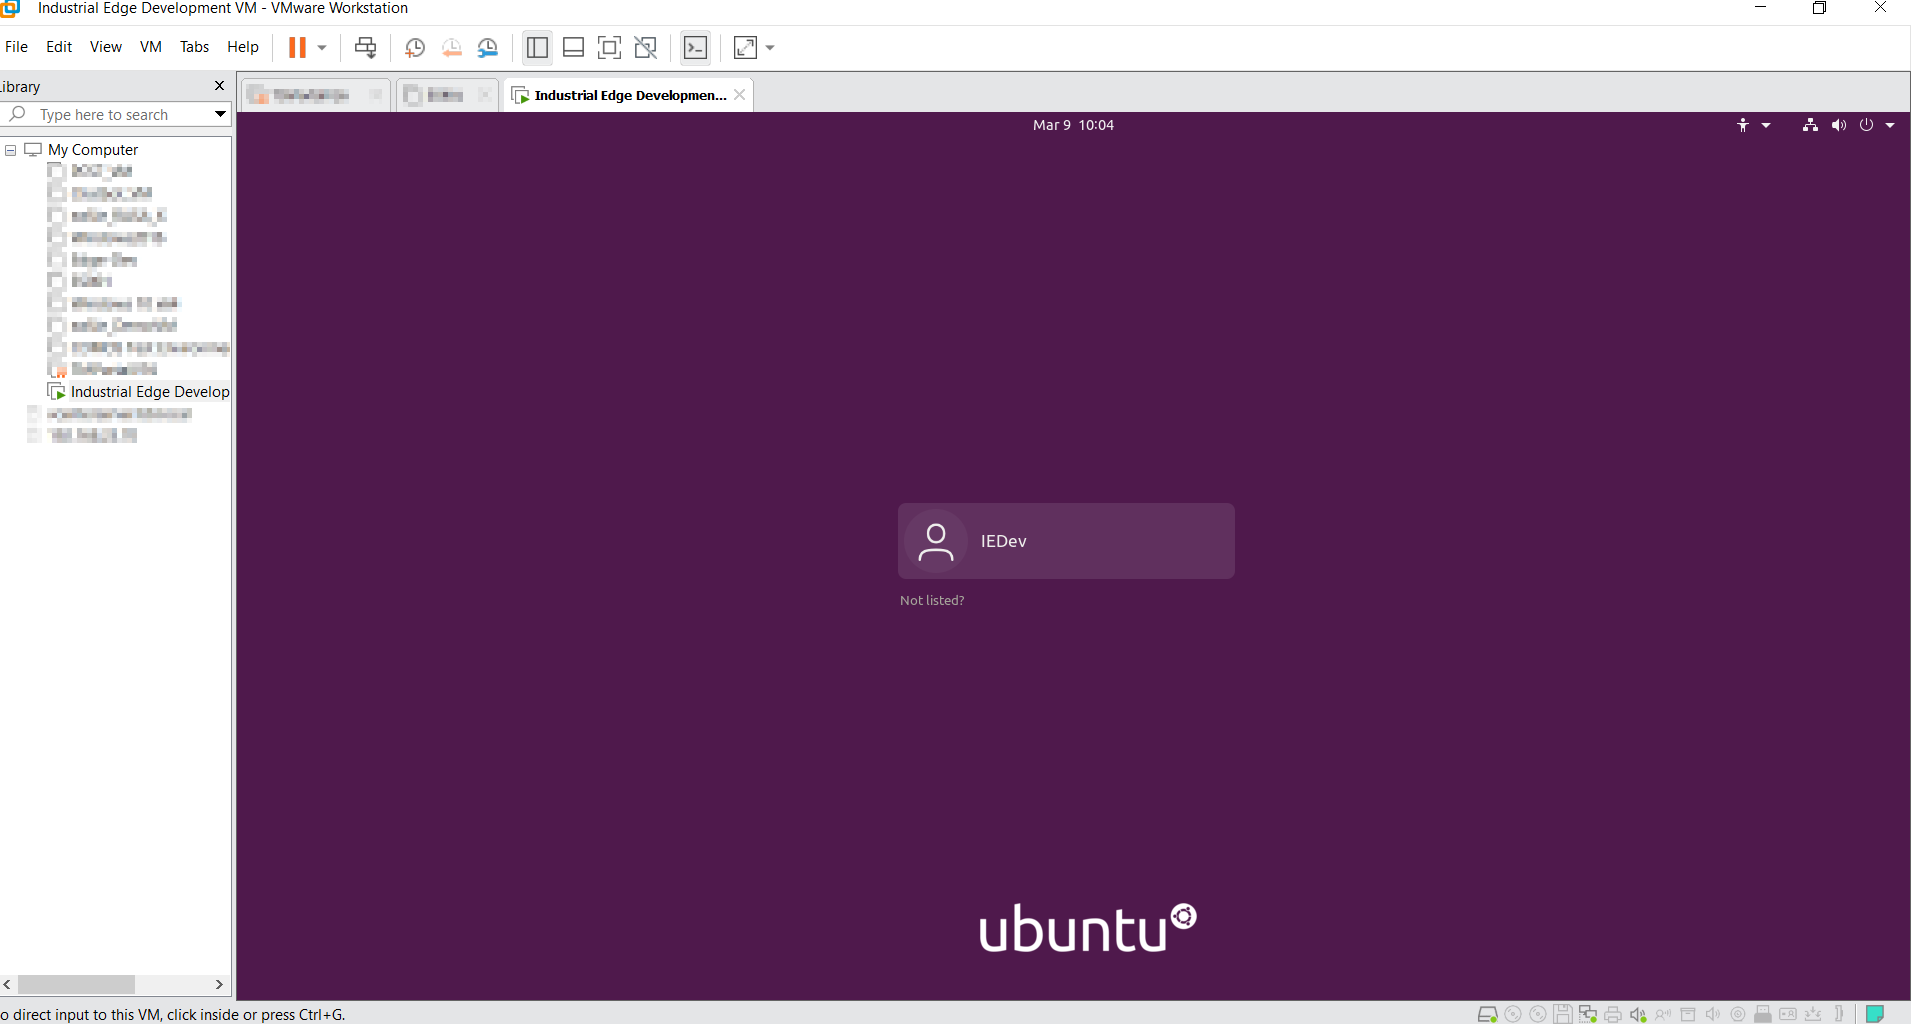
After you complete the creation dialog for the new virtual machine, the virtual machine will power up and Ubuntu will be installed.
The installation will finish automatically, and you can log in to complete the configuration of the operating system. Please customize the operating system based on your requirements, for example by setting the languages and keyboard.
Additional steps during Ubuntu installation
Starting with the installation of Ubuntu 21.04, Ubuntu's plugin that can install 3rd party drivers available on the media is run automatically. This requires an additional default option setting that was not previously needed. Because of this missing setting, the installation will stop at the "Updates and other software" screen. To proceed with the installation, click on Continue and follow the installation instructions.
