Onboarding an Industrial Edge Virtual Device
Virtual IE Devices offer the functionality of an IE Device without the need for dedicated physical hardware devices.
This tutorial uses the Industrial Edge Virtual Device to illustrate how to onboard an Industrial Edge Virtual Device.
Prerequisites for onboarding an Industrial Edge Virtual Device
Software requirements
- You have IE Hub Access.
- You have configured your IEM.
-
You have a hypervisor software. Running multiple hypervisors on one device can cause issues.
-
Hyper-V
- You have administrative rights on the Hyper-V host.
-
You have a tool to extract
.xzfiles, for example Linuxxz/taror a Windows tool such as 7-Zip.NOTICE
Follow official Microsoft instructions: Enable Hyper-V on Windows
Optional quick PowerShell example for Windows Server / Pro editions:
Enable-WindowsOptionalFeature -Online -FeatureName Microsoft-Hyper-V -All -NoRestartReboot the host if Hyper-V was newly enabled.
-
VMware Workstation Player 17 or VMware Workstation Pro 17 or later.
- You have an existing network setup.
- IP plan ready, either static or static through DHCP.
- Recommendations:
- Use a provided DNS server for name resolution.
- Use a provided NTP server for time synchronization.
-
External virtual switch configured (recommended). Internal switch only for advanced routing/NAT setups.
Creating a NAT switch on Hyper-V Manager
For official guidance, consult the Microsoft Hyper-V documentation on virtual switches and NAT configuration. For a practical walkthrough, see this Stack Exchange thread.
-
-
You have purchased an IE Virtual Device license. Find information about the purchase process in Purchasing IE App licenses on the Marketplace.
-
You have a computer for the virtual machine.
Recommended virtual machine requirements
To ensure the best result, Siemens recommends providing the minimum hardware requirements for the virtual machine.
Obtaining an Industrial Edge Virtual Device
To obtain the Industrial Edge Virtual Device, download the install-*.tar.gz file containing all supported hypervisor deployments from Industrial Edge Hub. The deployment files contain the virtual machine image used to create the Industrial Edge Virtual Device.
- Open IE Hub and log in with the IE Hub account that purchased the IE virtual device.
- In the left navigation pane, click "Library". The "Library" page opens.
-
In the search bar, search for `Industrial Edge Virtual Device". IE Hub displays the Industrial Edge Virtual Device tile.
-
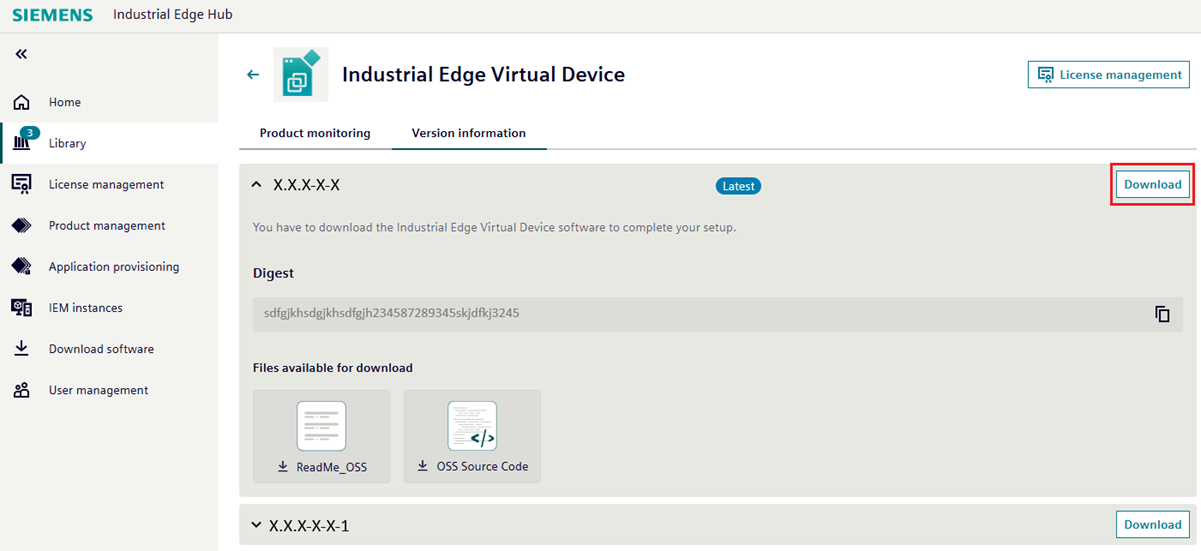
Click the "Industrial Edge Virtual Device" tile. The "Industrial Edge Virtual Device" page opens.
-
Under the "Version information" tab, click "Download" for the Industrial Edge Virtual Device version you wish to install. The
install-*.tar.gzfile downloads. -
Right-click the file and use your preferred extraction tool to extract the contents.
The extracted folder contains all supported hypervisor files.
Creating the virtual machine
Depending on the hypervisor software, complete the matching conditional steps.
Conditional steps
Creating the virtual machine
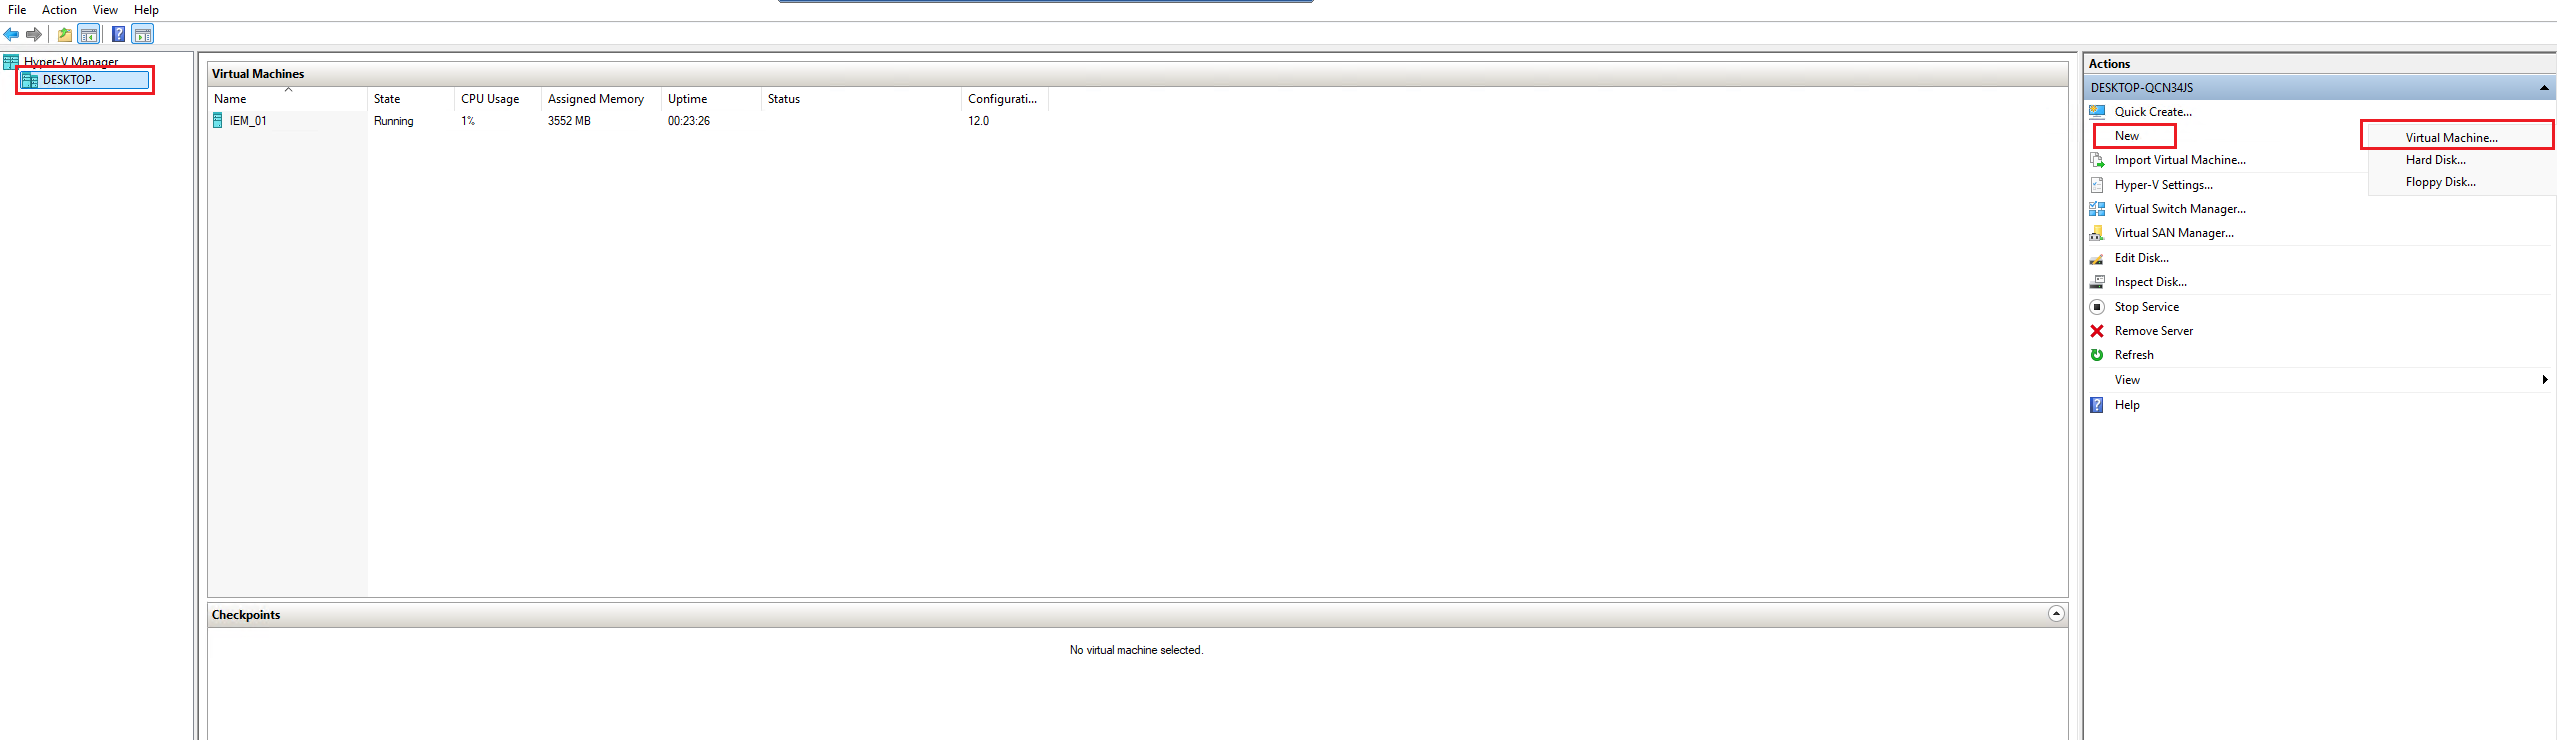
-
Right-click "New" in the upper-right pane and select "Virtual Machine...".
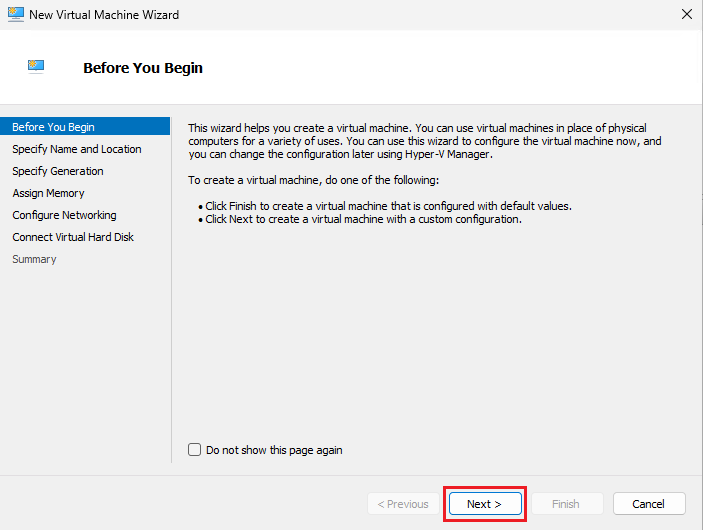
-
In the "New Virtual Machine Wizard", click "Next".
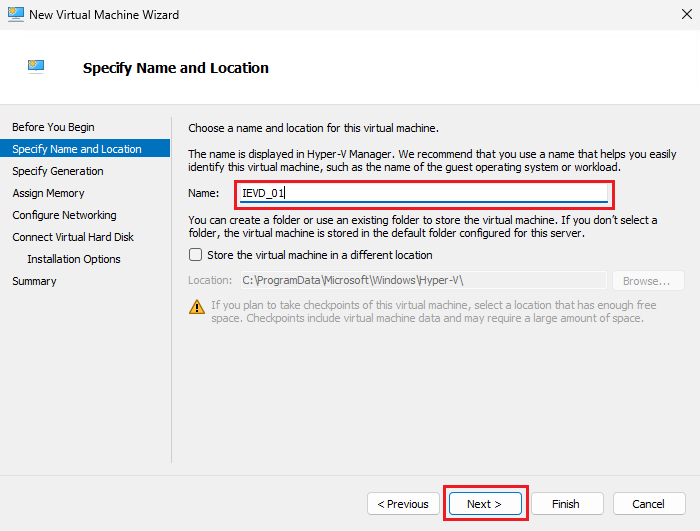
-
Enter a name for the virtual machine and optionally change the default store path. Click "Next".
-
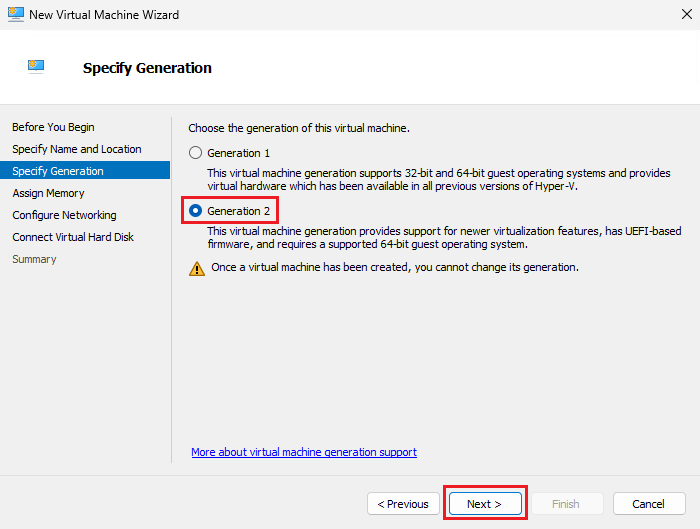
Select "Generation 2". Click "Next".
-
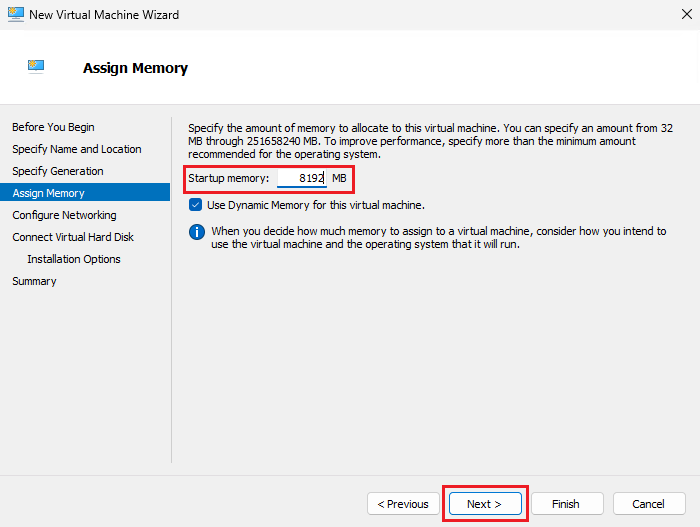
Enter the amount of memory to allocate and click "Next". Ensure the allocated memory meets minimum requirements.
-
Choose a virtual switch according to your network setup. This guide uses the "Default Switch". Click "Next".
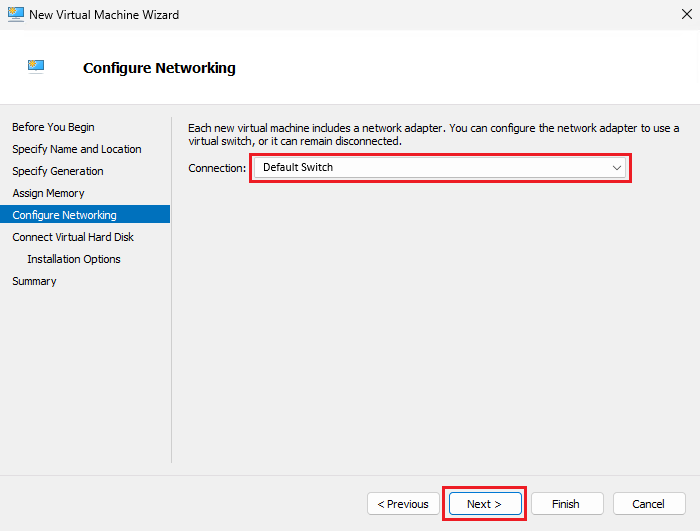
Choosing the right virtual switch
The Default Switch relies on NAT and dynamic addressing and is unsuitable for production stability. An Internal switch is viable only when you manually provide routing, NAT, or DHCP from the host.
-
Select "Use an existing virtual hard disk", browse to the downloaded and extracted
install-*folder, select the*.vhdxfile under Hyper-V, and click "Next".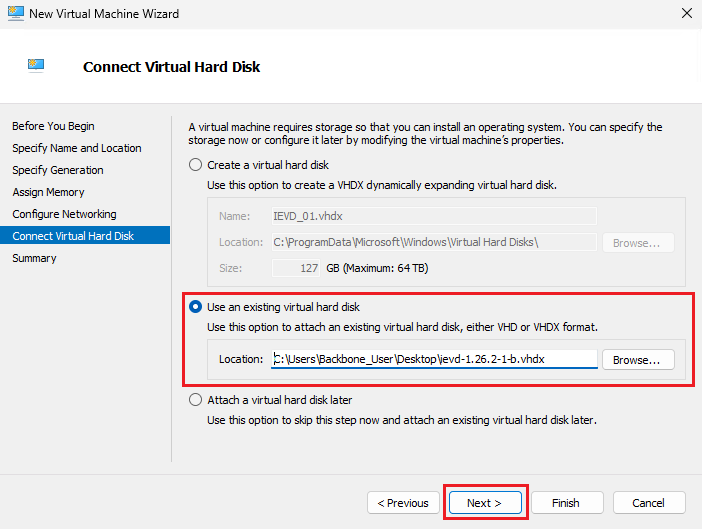
-
Review the configuration and click "Finish".
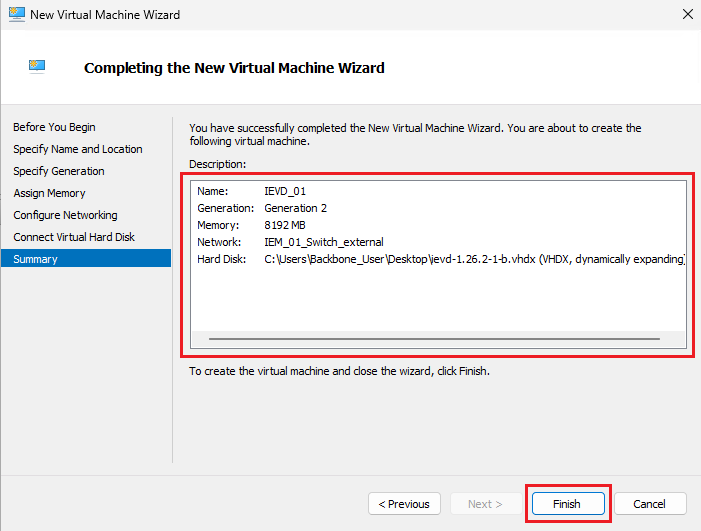
Hyper-V creates the virtual machine and it appears under "Virtual Machines".
Configuring the VM settings
-
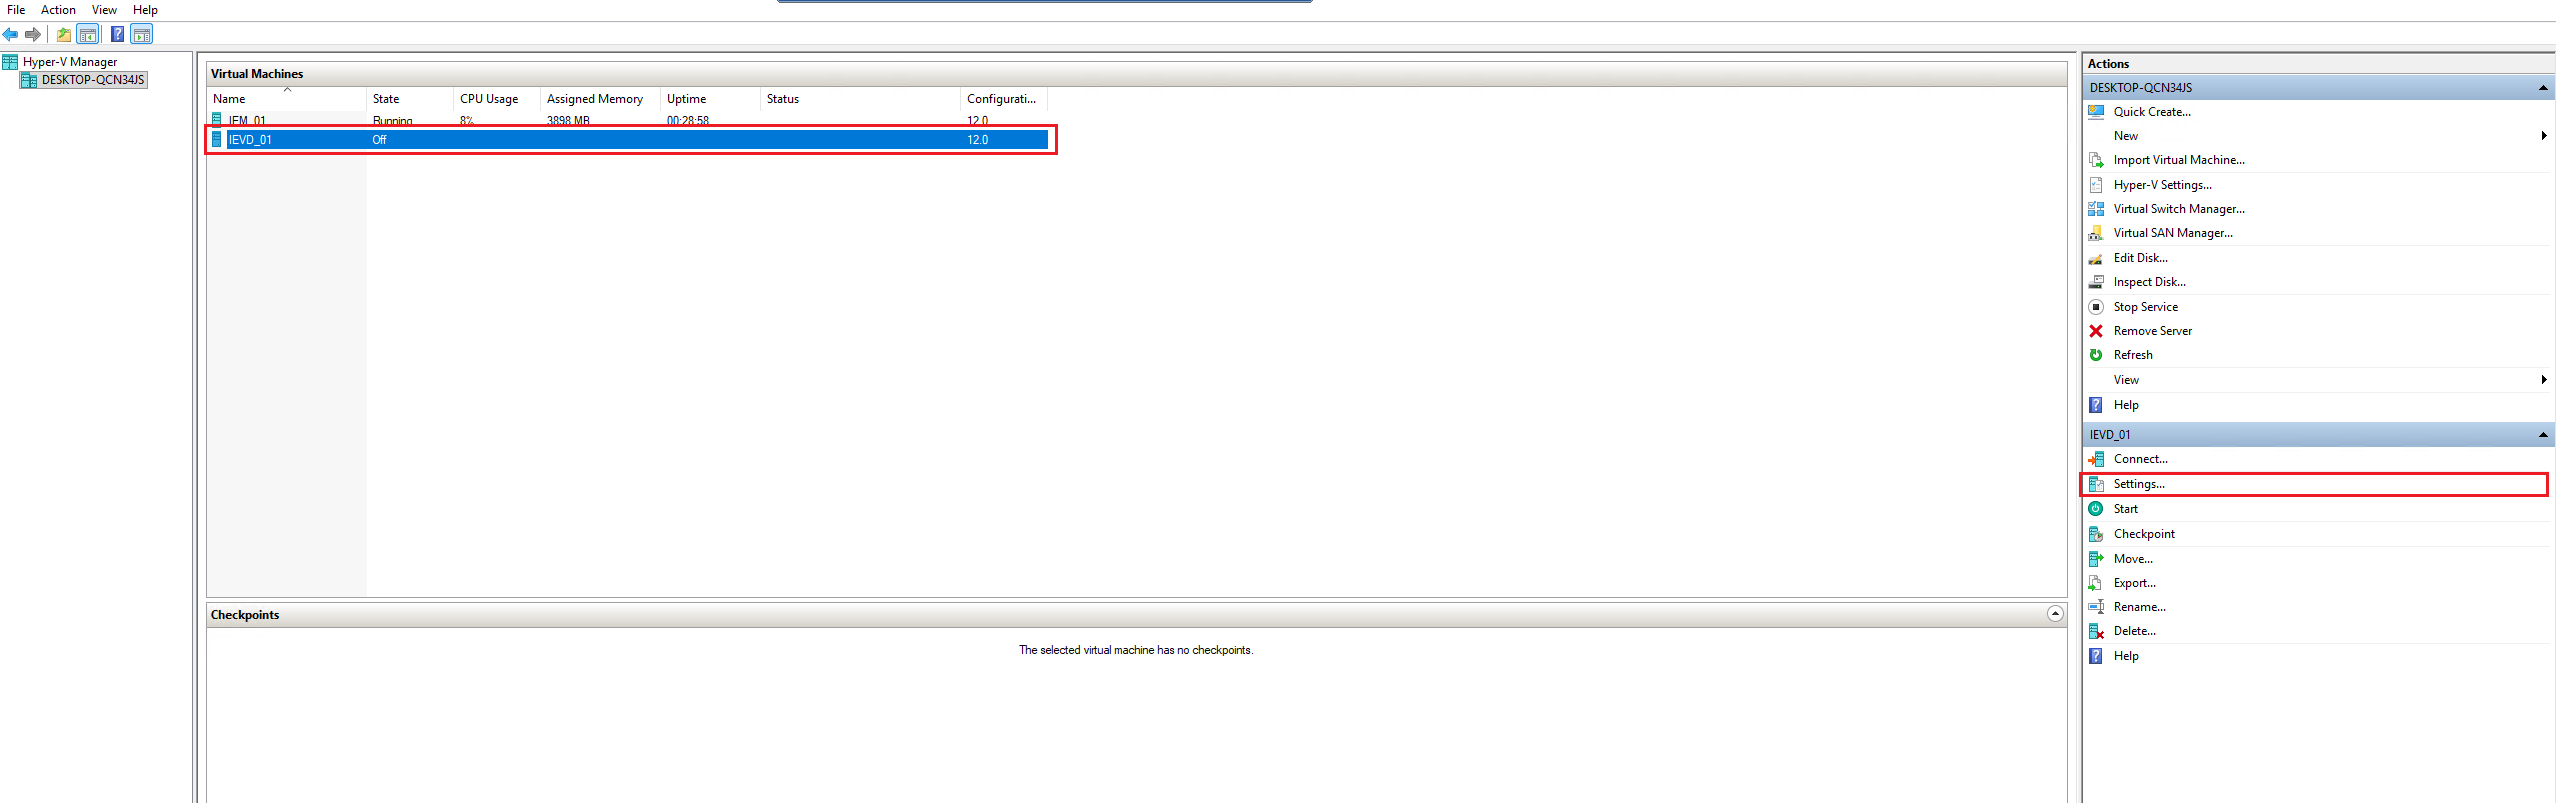
Select the previously created virtual machine and click the "Settings" button in the bottom-right pane.
-
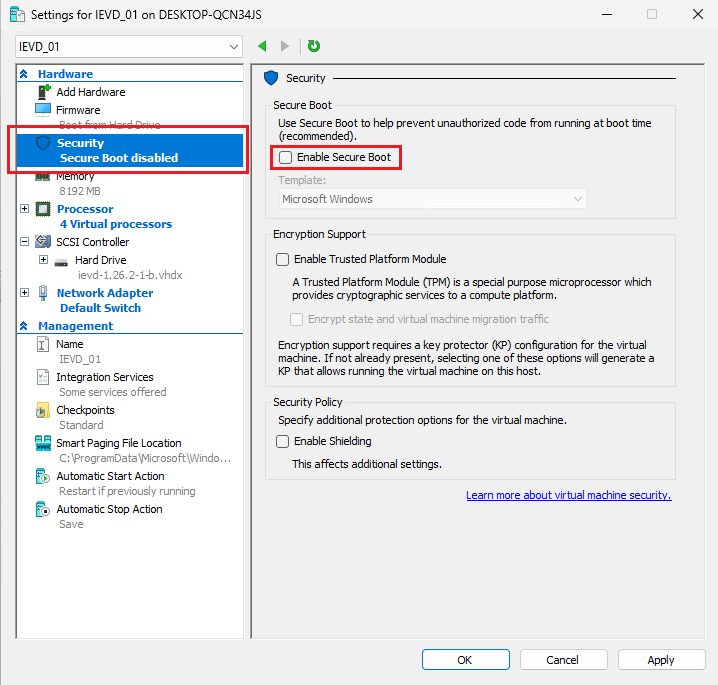
In the left pane, select "Security" and uncheck "Enable Secure Boot".
-
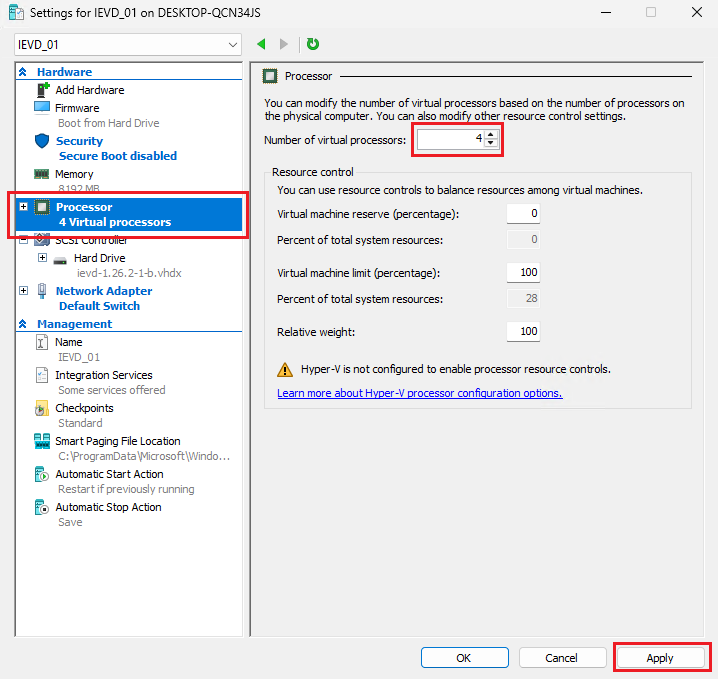
In the left pane, select "Processor", set the number of processors, and click "Apply" and "OK". Ensure the allocated processors meets minimum requirements.
Booting the virtual machine and accessing the UI
-
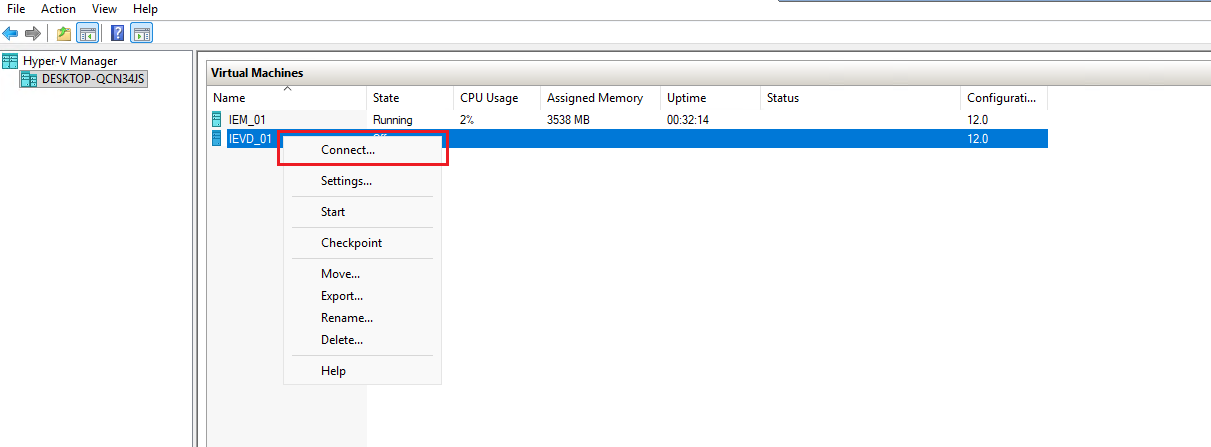
Right-click the virtual machine and select "Connect".
-
Click "Start" to boot the virtual machine.

-
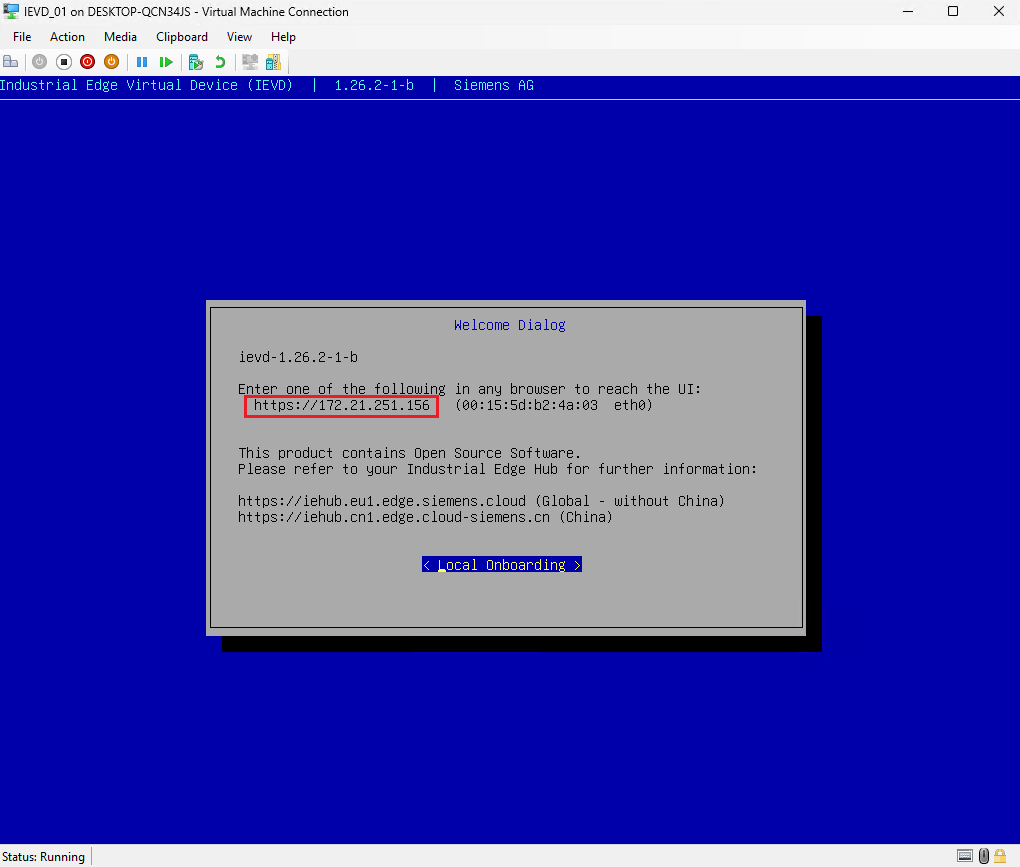
The virtual machine console display appears. Note the shown IP address and use it in a browser to continue with the setup.
Creating the virtual machine
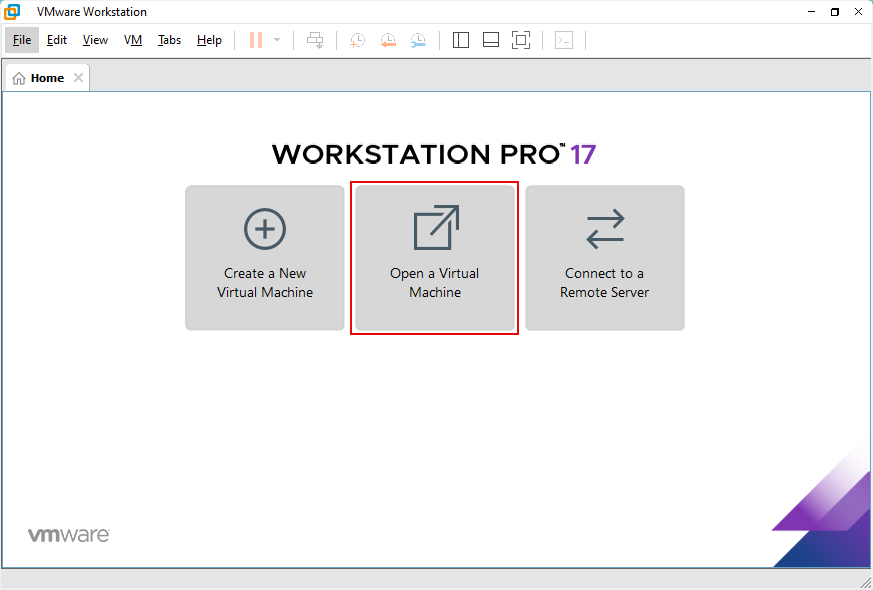
- Open VMware Workstation.
-
Click "Open a Virtual Machine".
-
Select the
.ovadeployment file downloaded from IE Hub. - Name your virtual machine.
- Select a storage path.
- Click "Import". VMware creates the virtual machine.
Connecting the Industrial Edge Virtual Device to the IEM instance
Once the virtual machine is created, connect the Industrial Edge Virtual Device to the IEM instance.
- Plug the Ethernet cable into the computer where the Industrial Edge Virtual Device is running.
- Establish a network connection between IEM and the IE Device.
- Open VMware.
- Navigate to the virtual machine created in Obtaining an Industrial Edge Virtual Device.
-
Click "Power on this Virtual Machine". The virtual machine boots up.
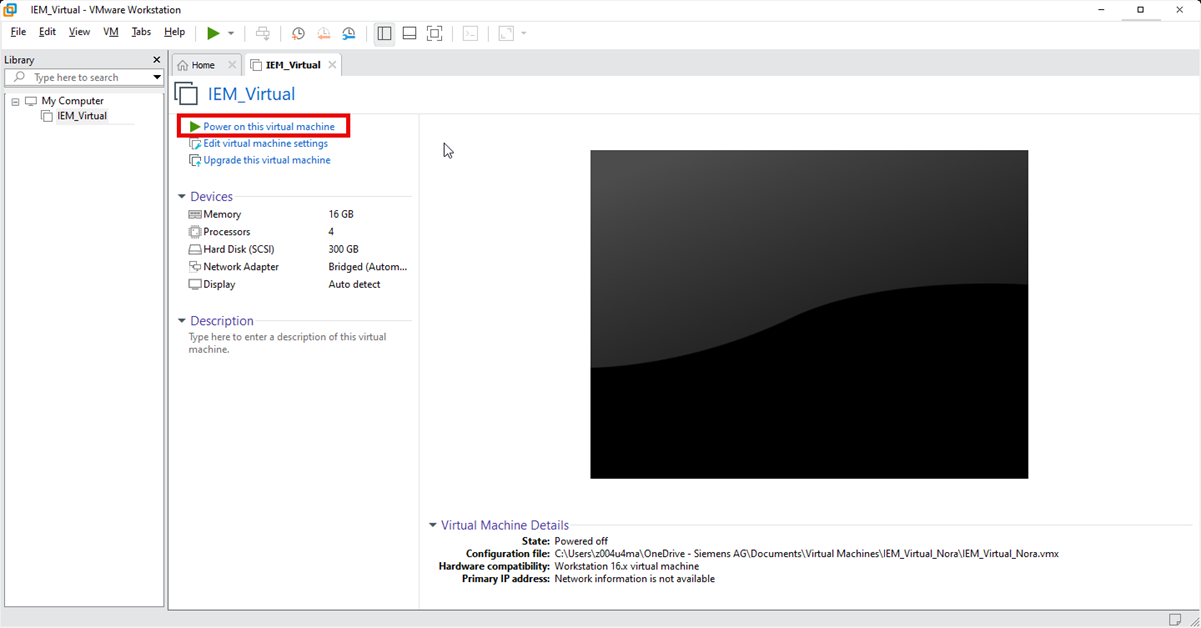
-
When the IE Device finishes booting up, the screen displays the IE Device IP address. Note down the IP address. DHCP on your network determines the IP address.

Creating the virtual machine
- Open VMware ESXi.
-
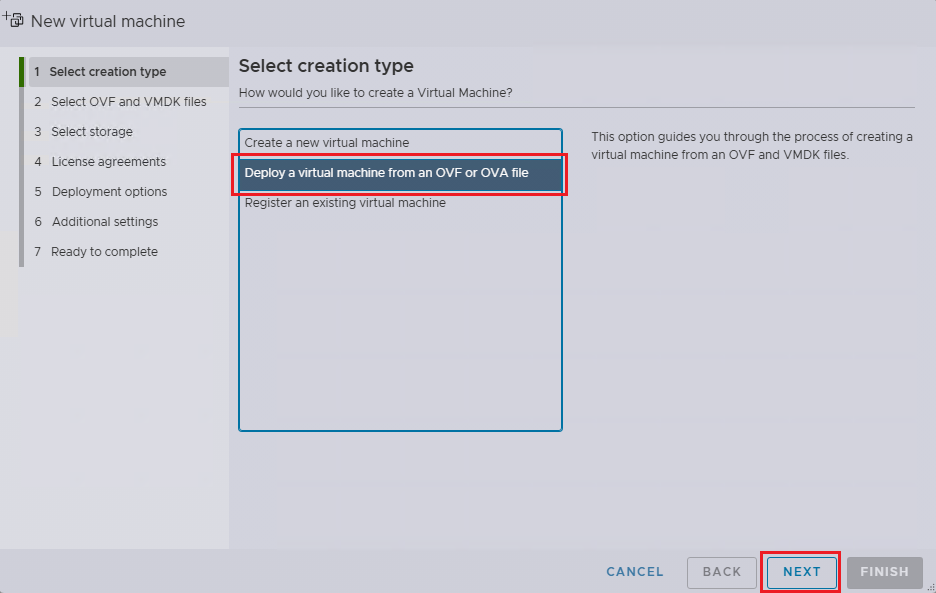
Click "Create/Register VM" in the middle panel to open the "New Virtual Machine" wizard.

-
Select "Deploy a virtual machine from an OVF or OVA file". Click "NEXT".
-
Enter a name for the IEM in the upper text field, select the previously downloaded
.ovafile, and click "NEXT".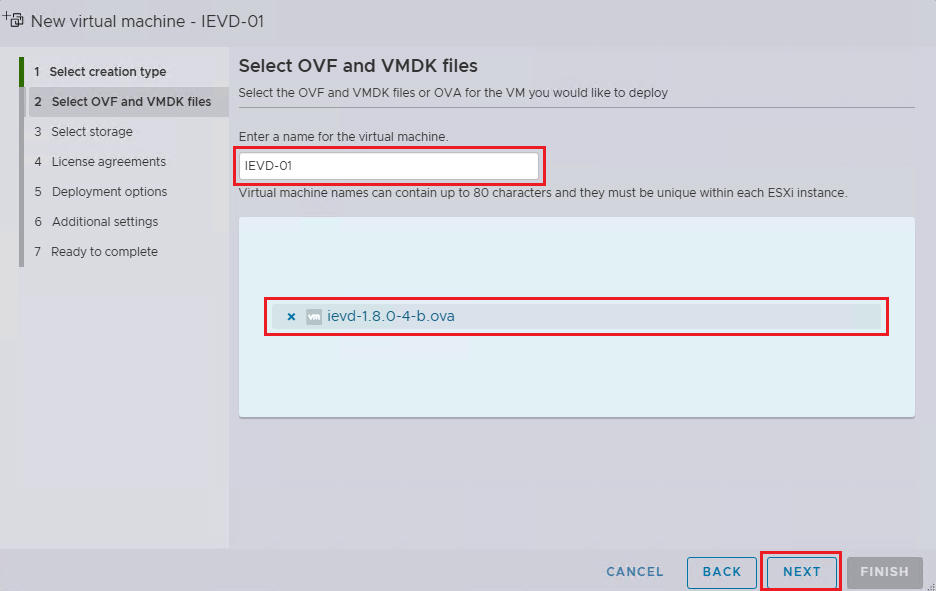
-
On the "Select storage" window, choose a datastore if different from the default and click "NEXT".
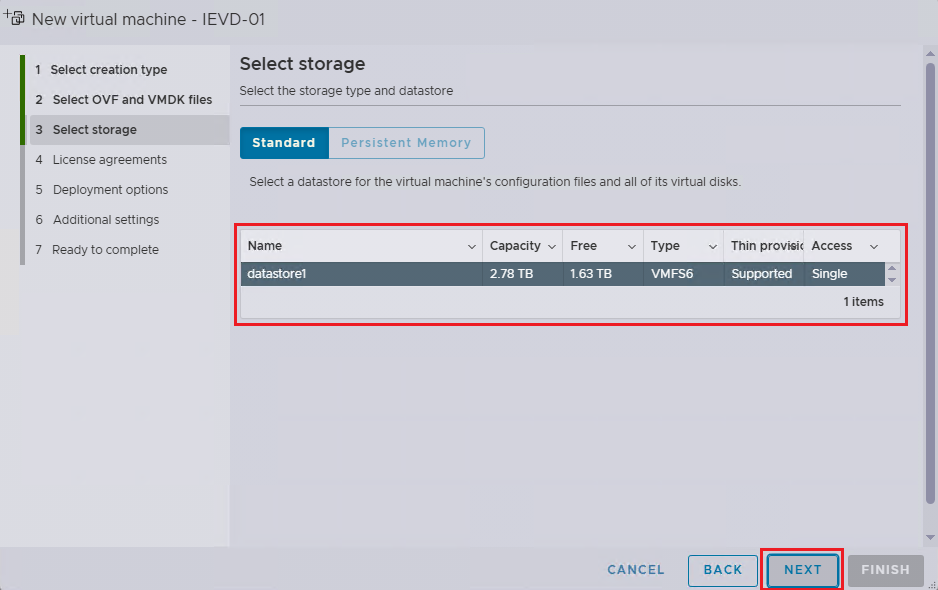
NOTICE
Insufficient storage can damage the IEM Virtual installation.
-
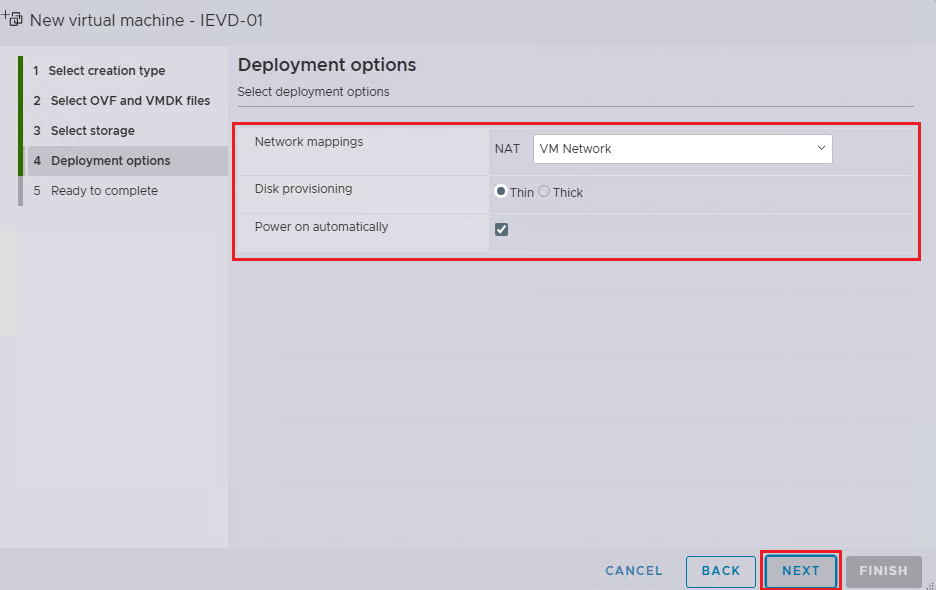
On the Deployment options window:
- Choose a Network mapping, if different from default.
- Choose the Disk Provisioning option.
- Power on automatically option: if unchecked, the user will need to manually power on the VM after creation. Once done, click Next. Click "NEXT".
NOTICE
Thick = ESXi immediately allocates the full size of the datastore
Thin = ESXi keeps the disk’s max size in the size of the datastore, but only consumes the actually used space initially
-
Review your selections and click "FINISH".
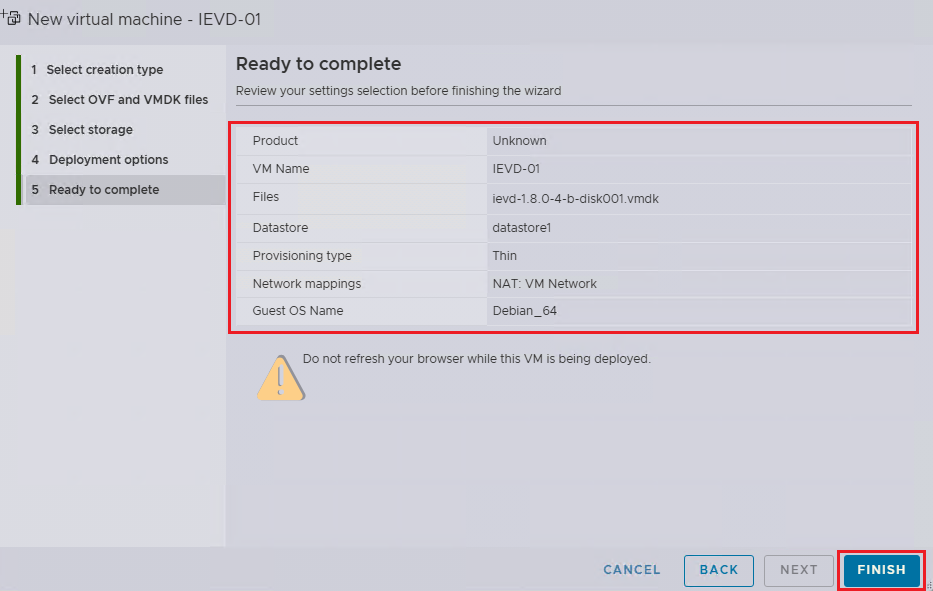
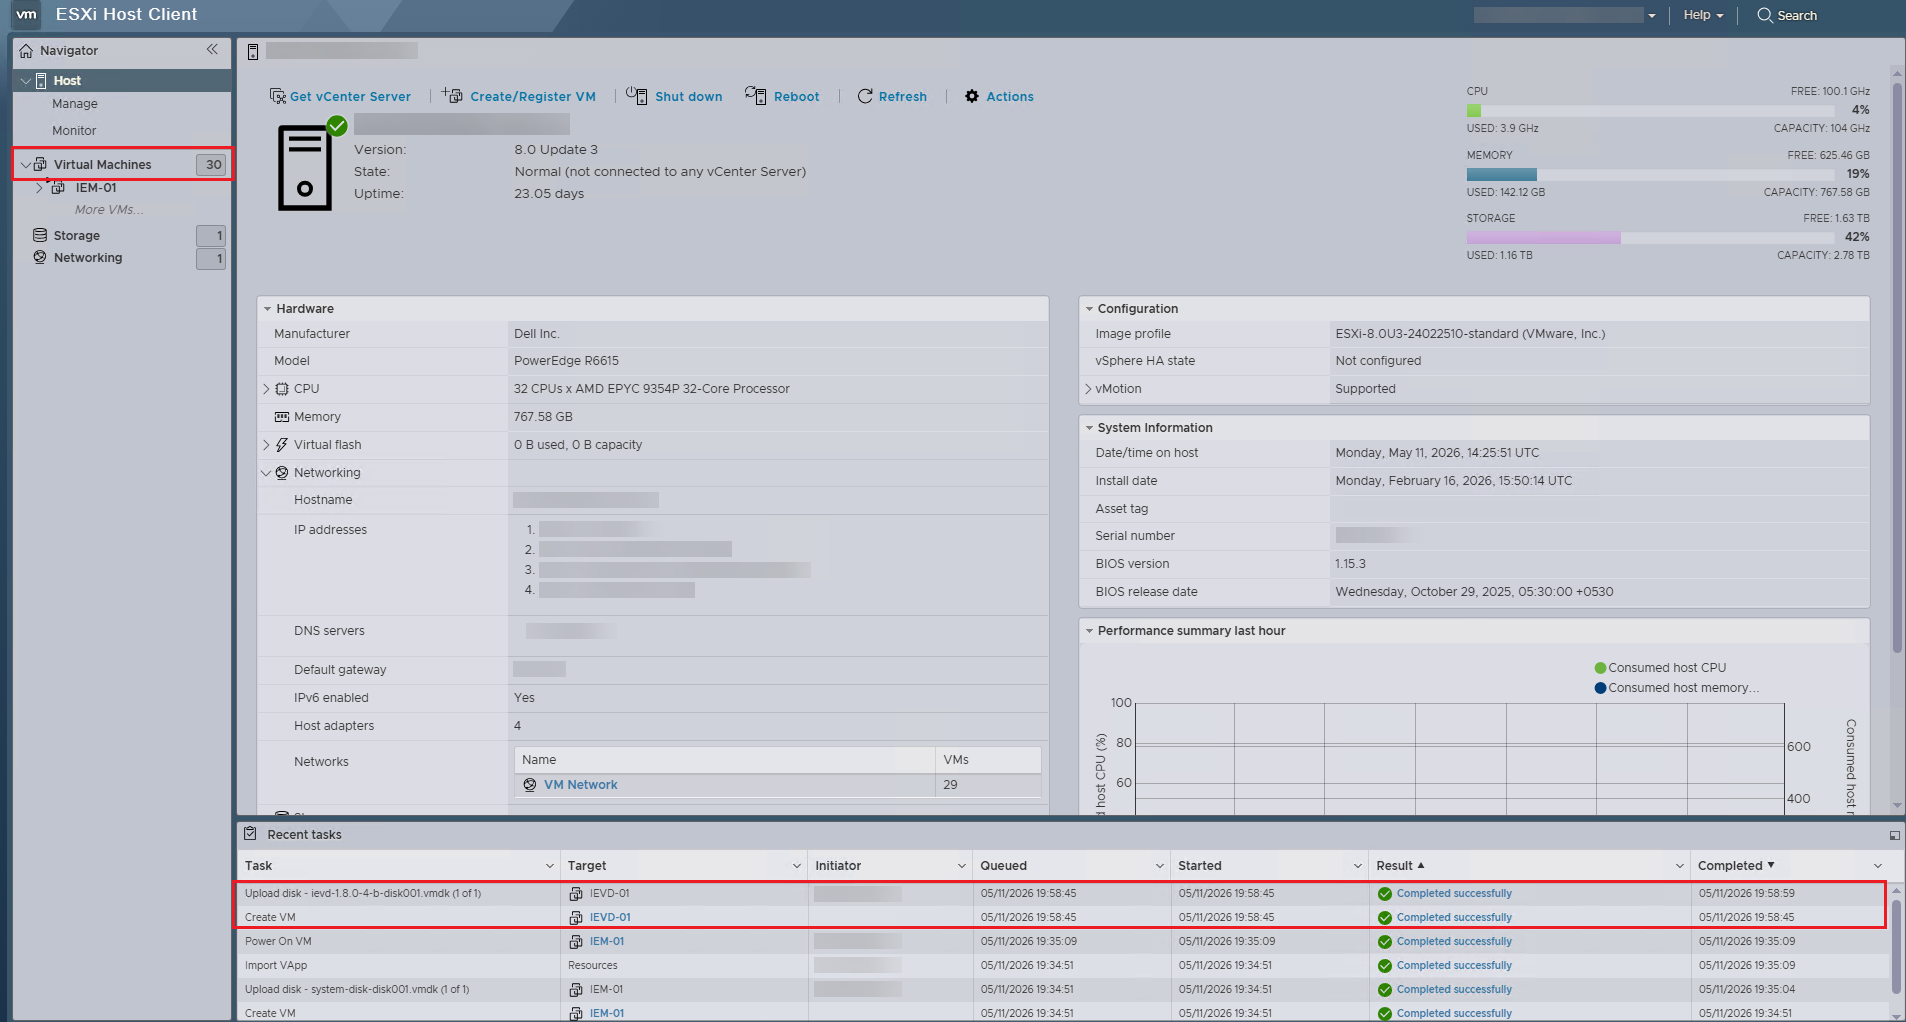
-
Check the logs in the bottom-center panel under "Recent Tasks" to verify that the IEM Virtual VM was created successfully.
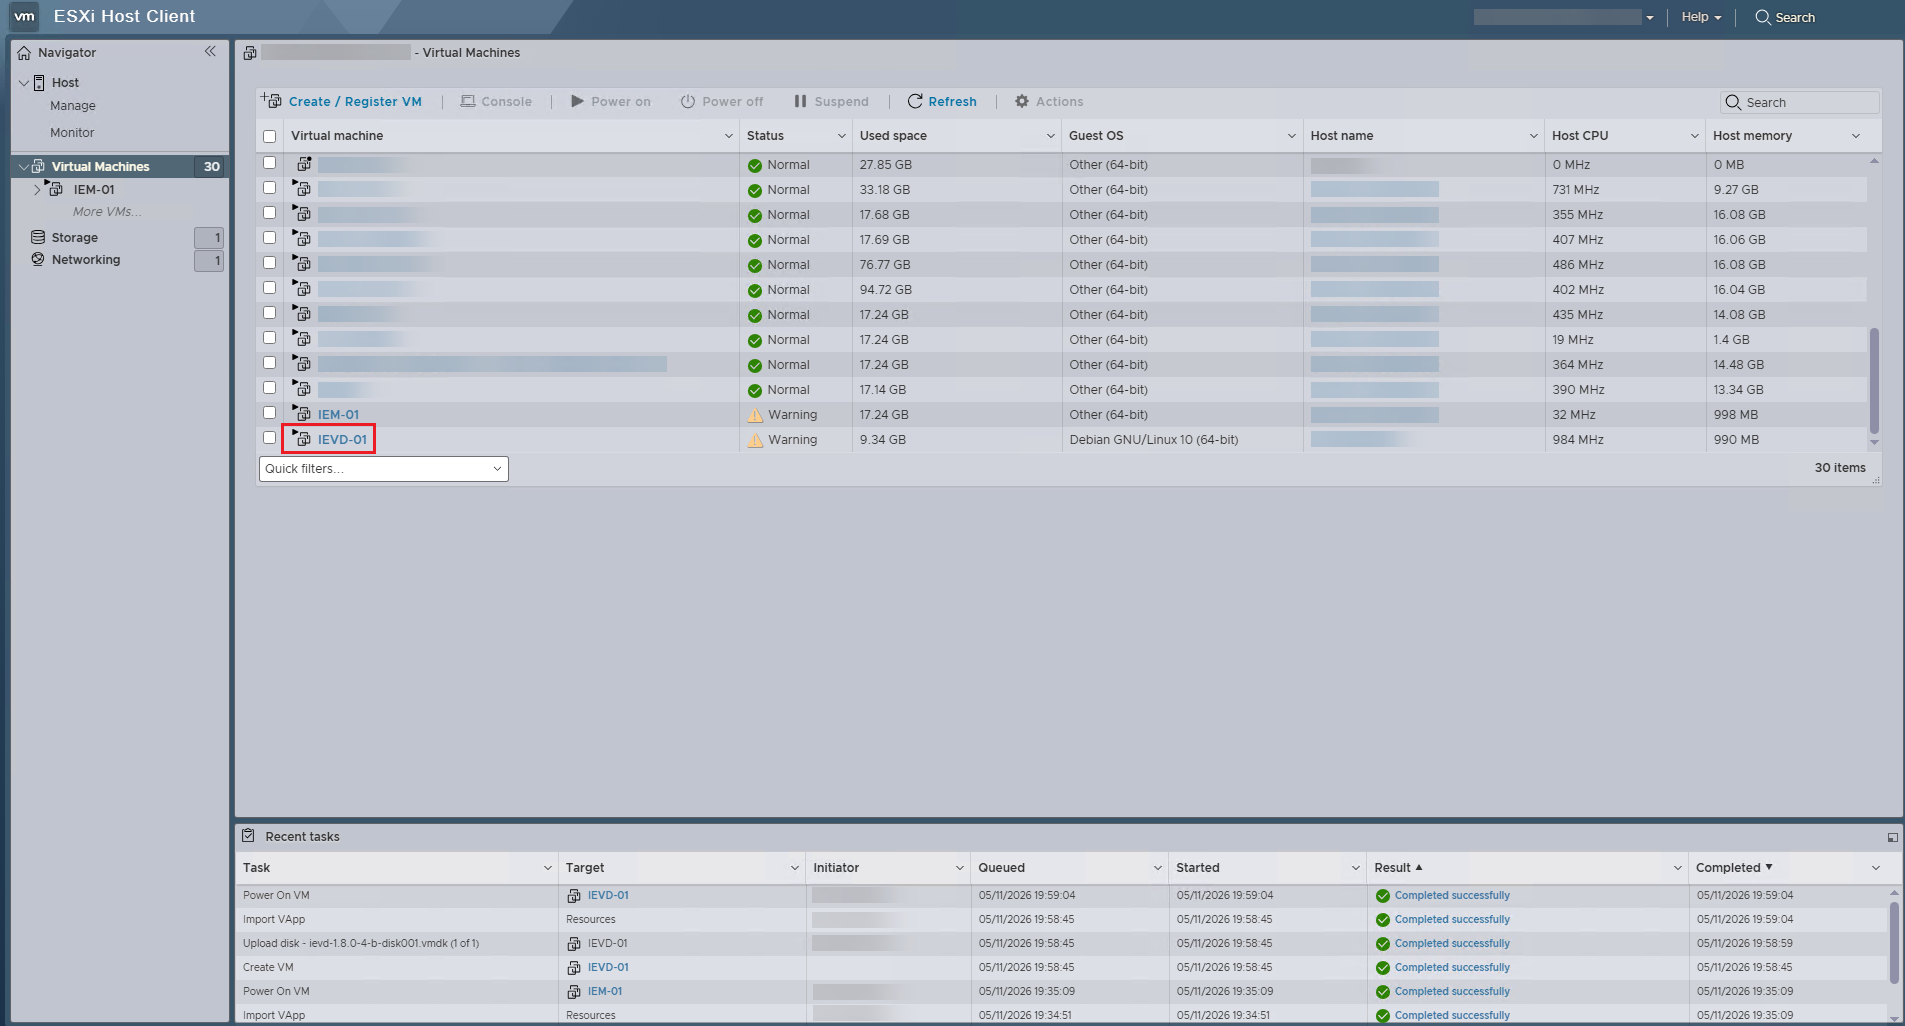
-
Select "Virtual Machines" in the Navigator panel.
-
Click on the newly created Virtual Machine. Usually, this can be found at the bottom.
-
Click on "Console" to open the console options.

-
Select "Open browser console" from the drop-down menu. The console opens.
-
When the IE Device finishes booting up, the screen displays the IE Device IP address. Note down the IP address. DHCP on your network determines the IP address.
Static IP Configuration
If there is no DHCP server available in your environment, configure a static IP address from the console so you can access the First Boot Wizard for further configurations. Proceed with Defining a static IP address to set up a static IP address or refer to Onboarding a physical IE Device via a USB stick.
NOTICE
Do not reduce CPU or RAM during the onboarding period.
Creating the configuration file for an Industrial Edge Virtual Device
IE Devices require a configuration file from Industrial Edge Management for the onboarding process. This procedure is similar for IEM Cloud, IEM Virtual, and IEM Pro.
- On the computer where the Industrial Edge Virtual Device is running, open Industrial Edge Management.
- If required, log in.
-
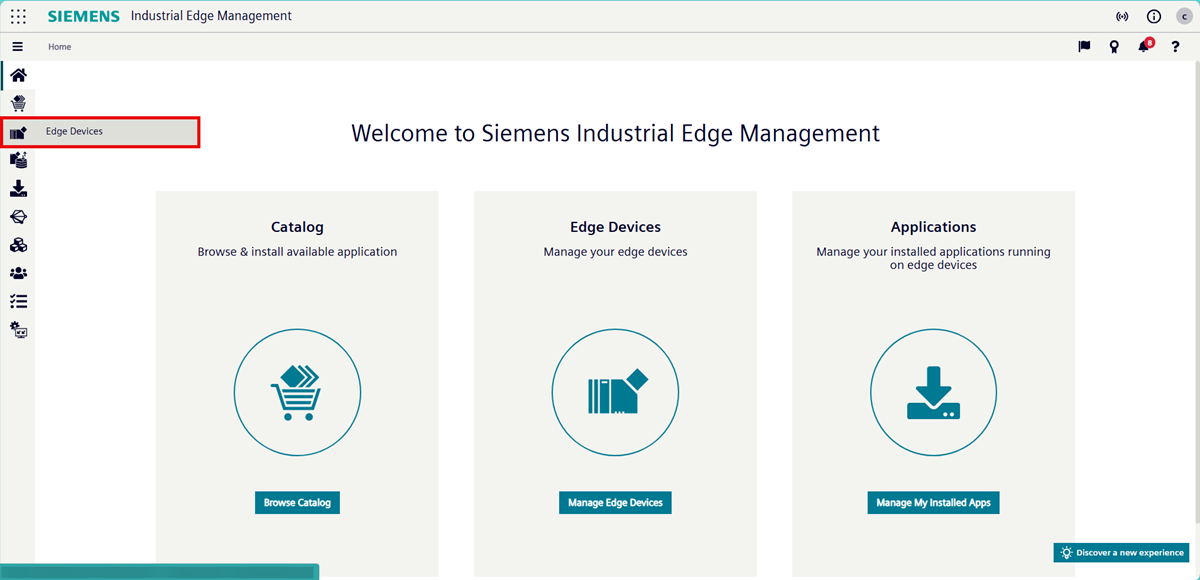
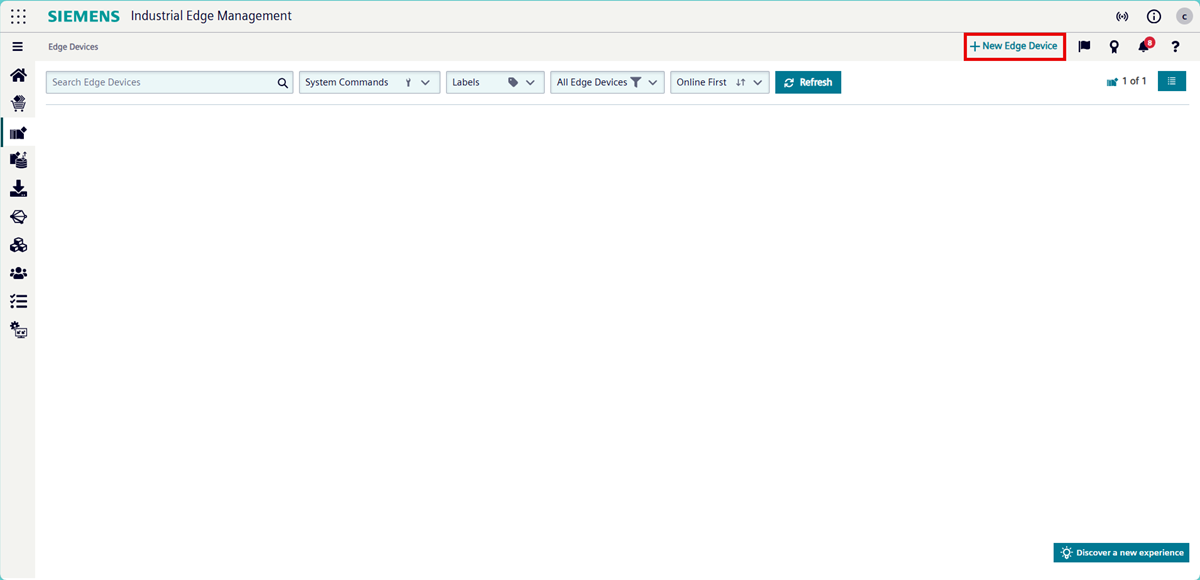
Click "Edge Devices". The "Edge Devices" page opens.
-
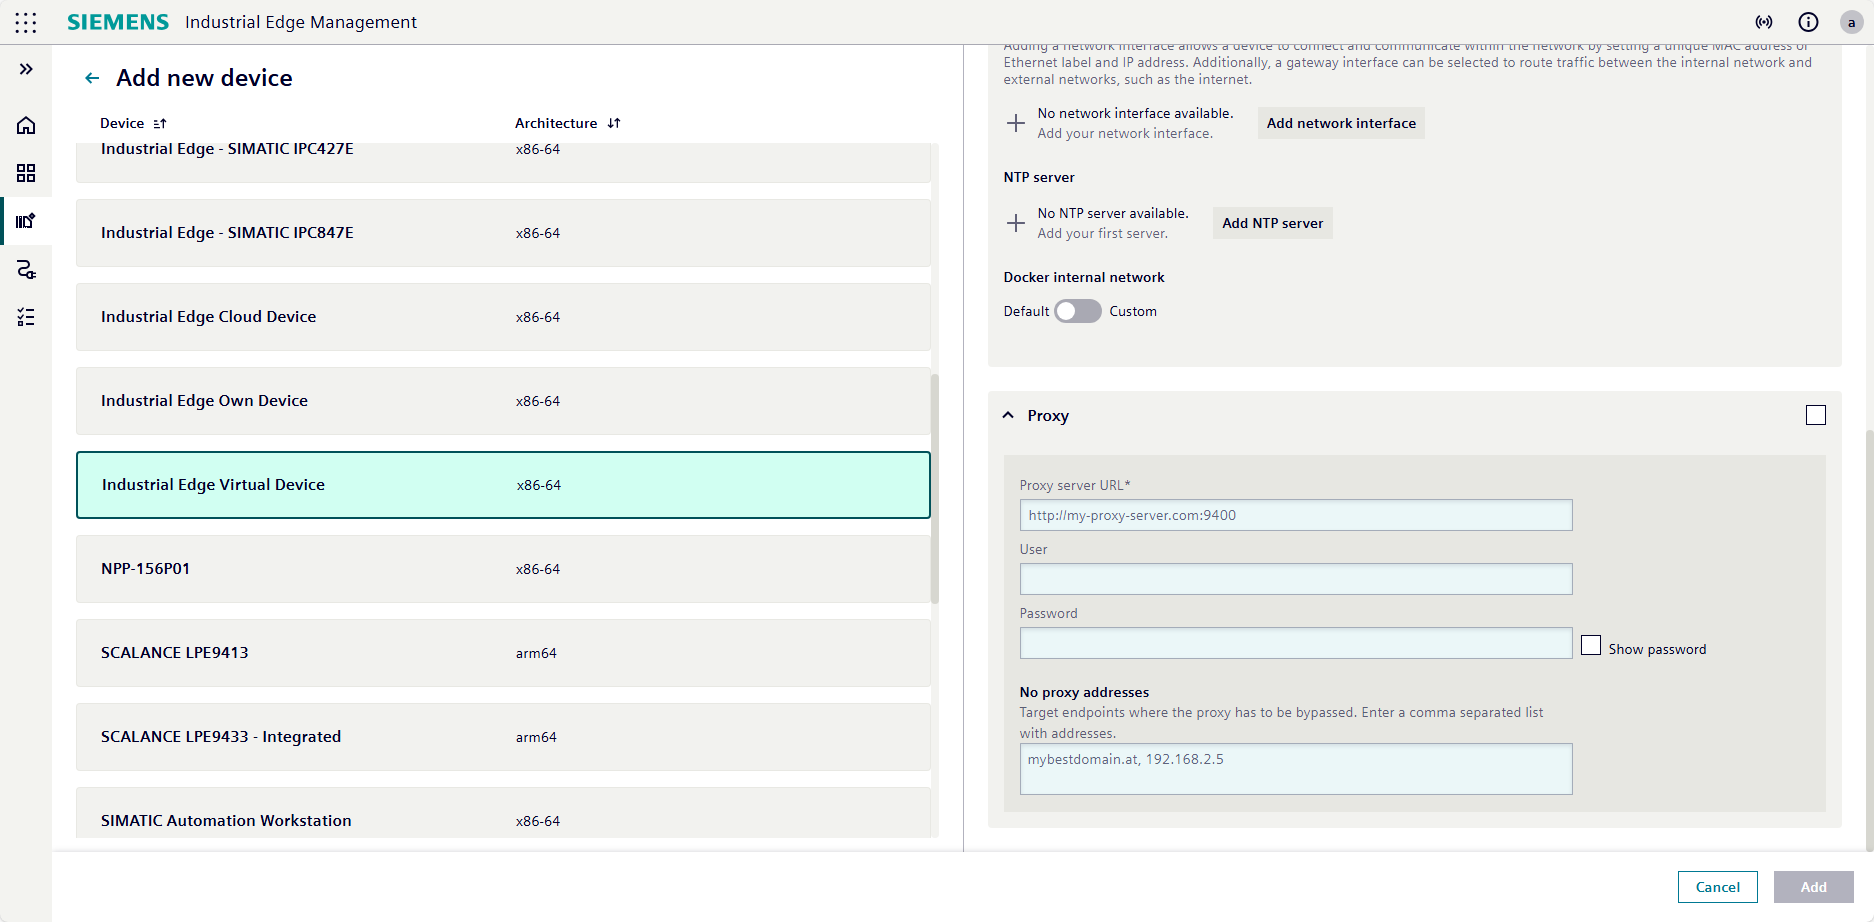
Click "+ Add Device". The "Add new Device" page opens.
-
Select the
Industrial Edge Virtual Devicetype from the list displayed.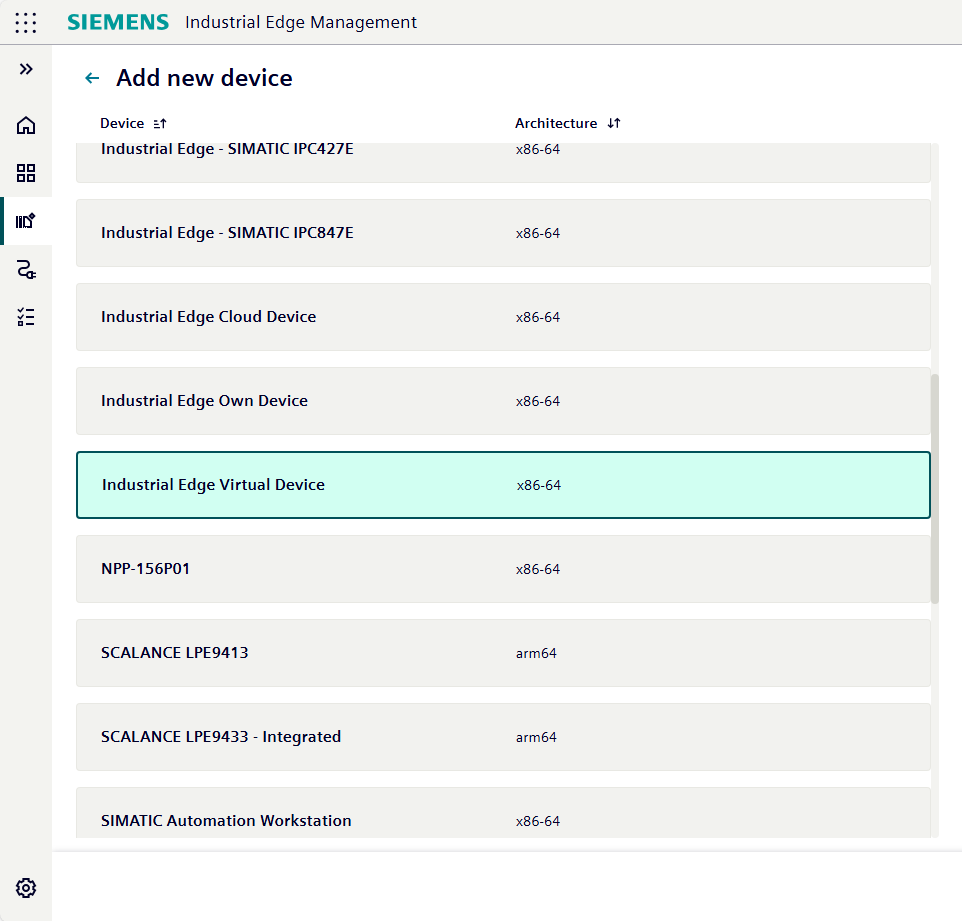
-
Define the following information:
Field Input Edge Device Name Enter a unique device name.
The device name must be 3–64 characters long and may only contain alphanumeric characters and.,+,-, and_.
In this example,MyIEvDis used.Edge Device Username (Email) Enter the email address that should be used to log in to the device. Edge Device Password Enter the password that should be used to log in to the device.
The password must be at least 8 characters long and contain at least one capital letter, special character, and number.
Credentials cannot be recovered
Note down the credentials or store them in a password manager.
-
Setup the expiration time of onboarding file.
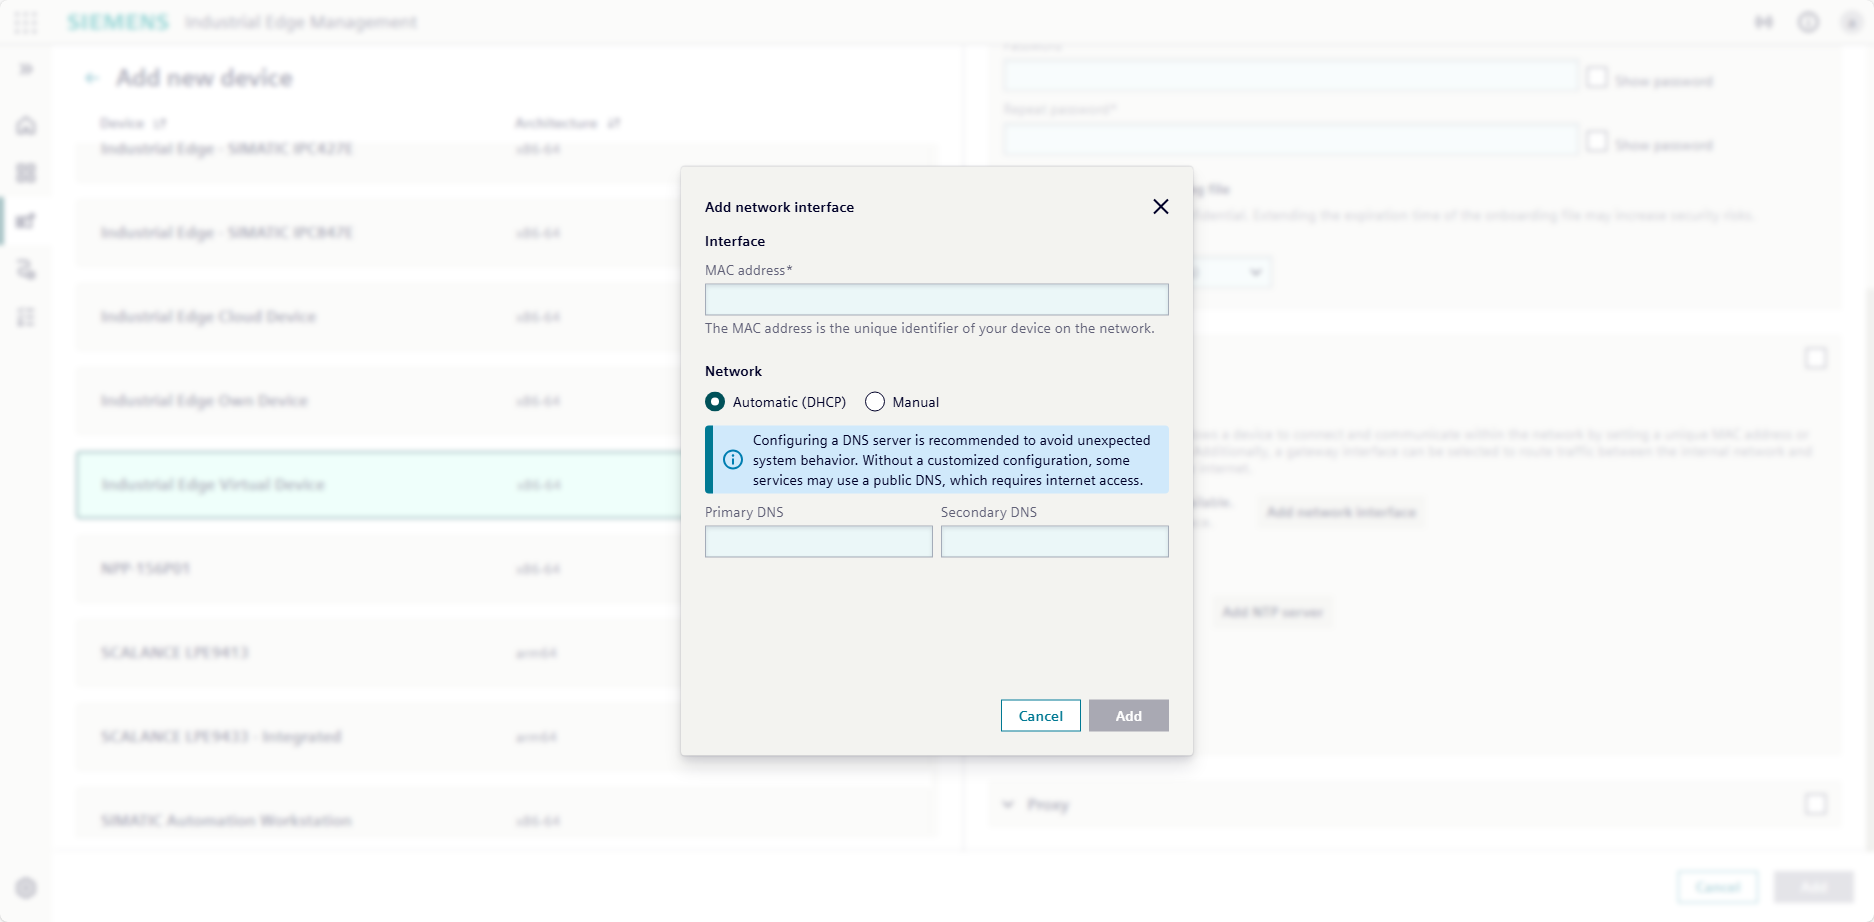
- Click "Next". The "Network Interface" page opens. For DHCP, do not create an interface. If you want to use a static IP address, add an interface.
-
If using DHCP, select "Automatic (DHCP)" and when needed, configure a DNS server.
-
If using a static IP address, select "Manual" and fill the mandatory information.
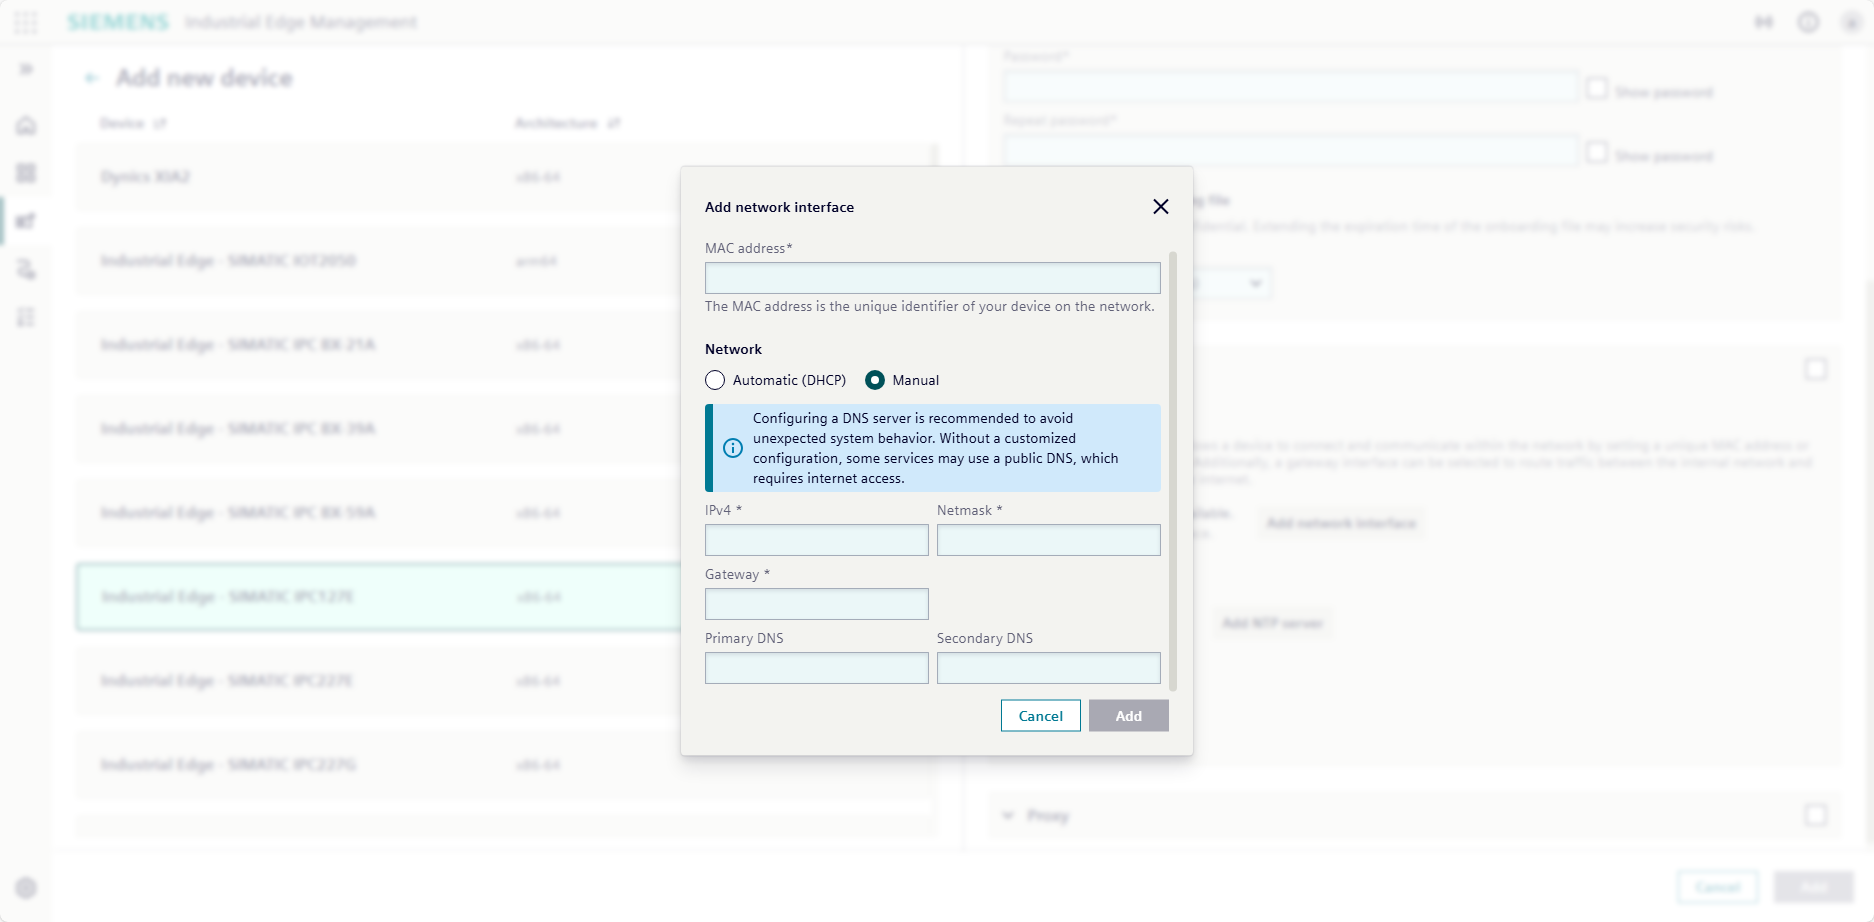
-
The network configuration includes setting a Network Time Protocol (NTP) server. The NTP server is responsible for time synchronization. To set a NTP server, click "Add NTP server" and enter your network's NTP server or use a public NTP server such as
pool.ntp.org.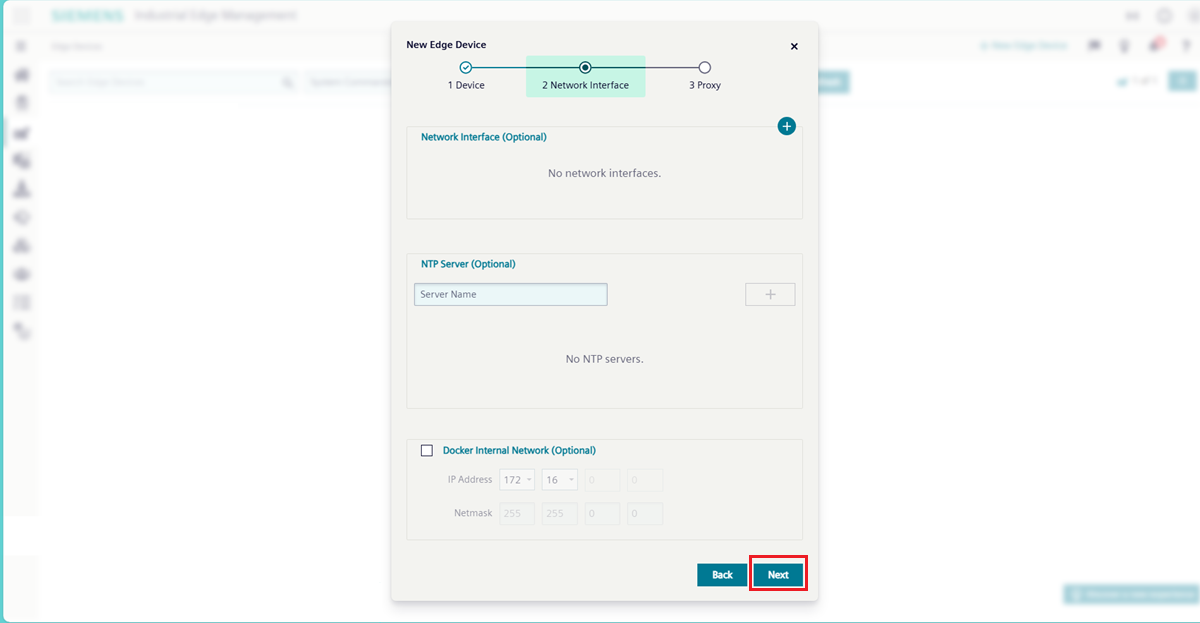
-
If needed, expand the "Proxy" area and specify the configuration for your proxy. If you do not have a proxy, leave the fields blank.
-
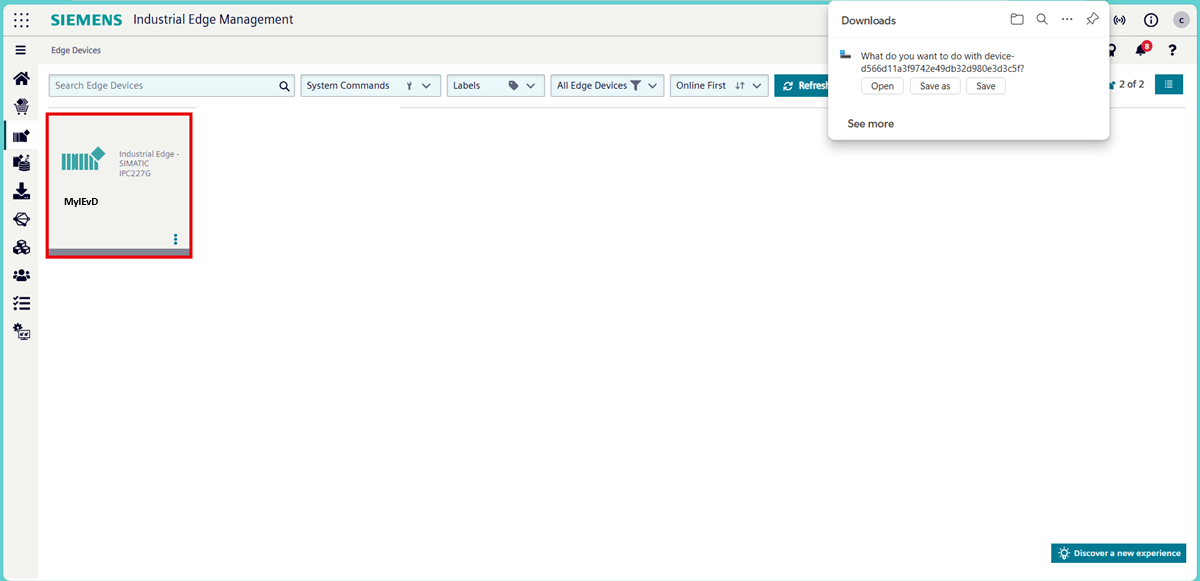
Click "Add". The configuration file downloads according to your browser settings. The configuration file follows the naming convention of
device-<deviceID>.Valid for one hour (default)
The configuration file is only valid for one hour by default. After one hour, the file expires and you must download a new configuration file.
-
IEM displays the "Edge Devices" page with the new IE Device listed.
Once the configuration file downloads, proceed directly to Onboarding the Industrial Edge Virtual Device via web browser.
Onboarding the Industrial Edge Virtual Device via web browser
- Open the web browser on your local computer.
-
Enter the previously noted IP address of the IE Device with HTTPS, for example
https://<ip address>. The browser may display the "Your connection isn't private" warning page because the IE Device uses a self-signed certificate for the UI.
-
Click "Advanced". The screen displays a warning about the server security certificate.
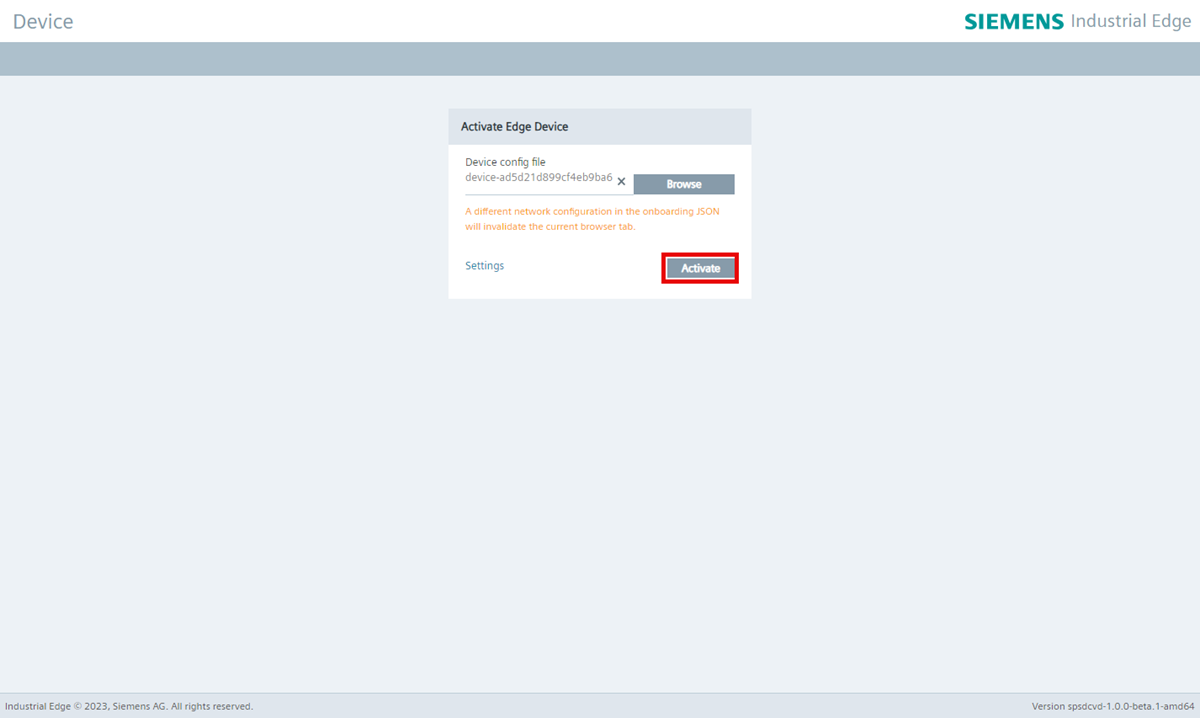
- Click "Continue to XXX.XXX.XX.XXX (unsafe)". The IE Device UI displays the "Activate Edge Device" page.
-
To onboard the IE Device, click "Browse".
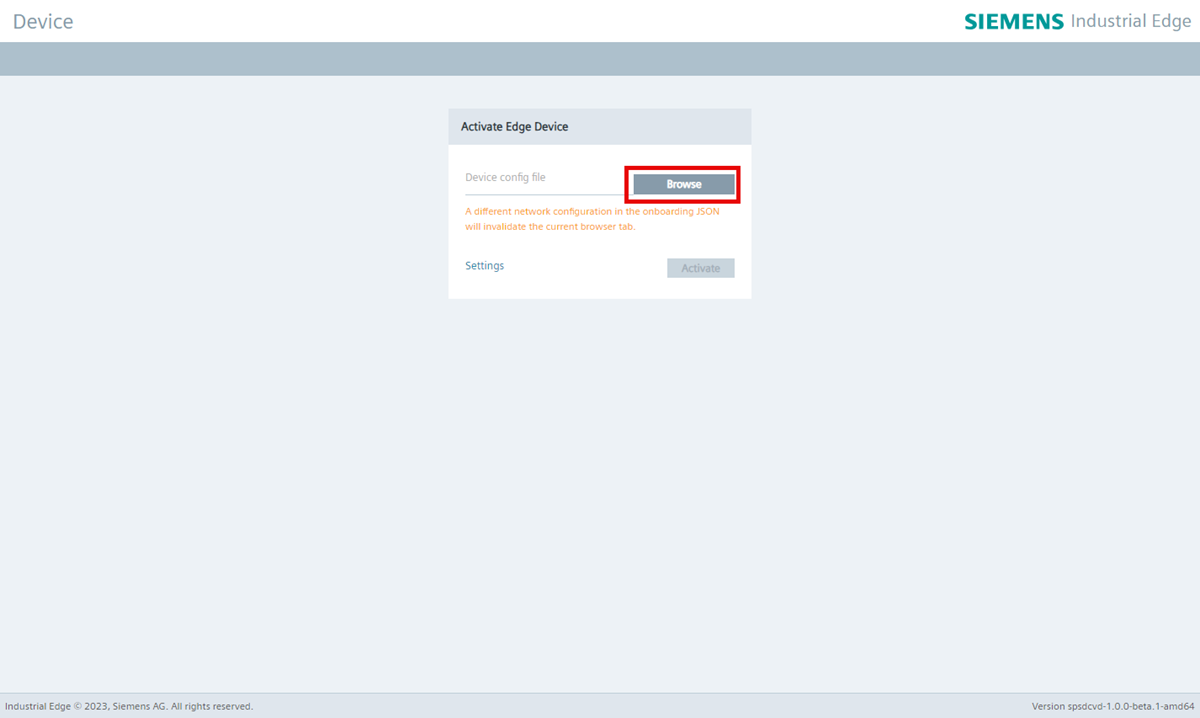
-
Select the configuration file downloaded previously.
-
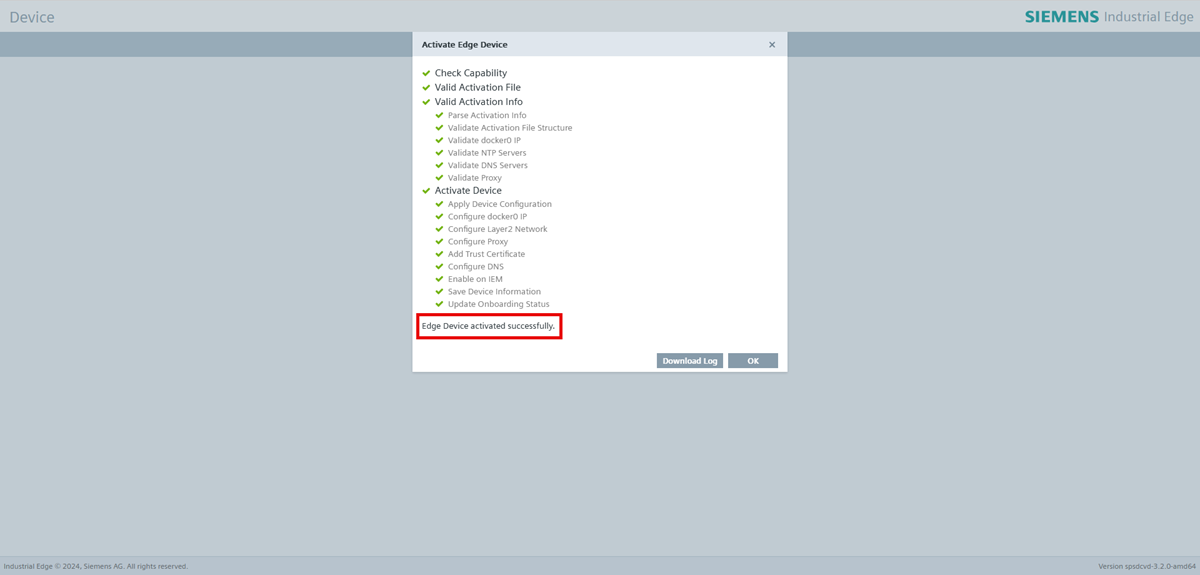
Click "Activate". The onboarding process begins and the screen displays a progress list.
-
When the onboarding completes, click "OK". The screen displays the IE Device UI login screen.
-
Enter the login credentials previously defined in the configuration file. The IE Device logs in.
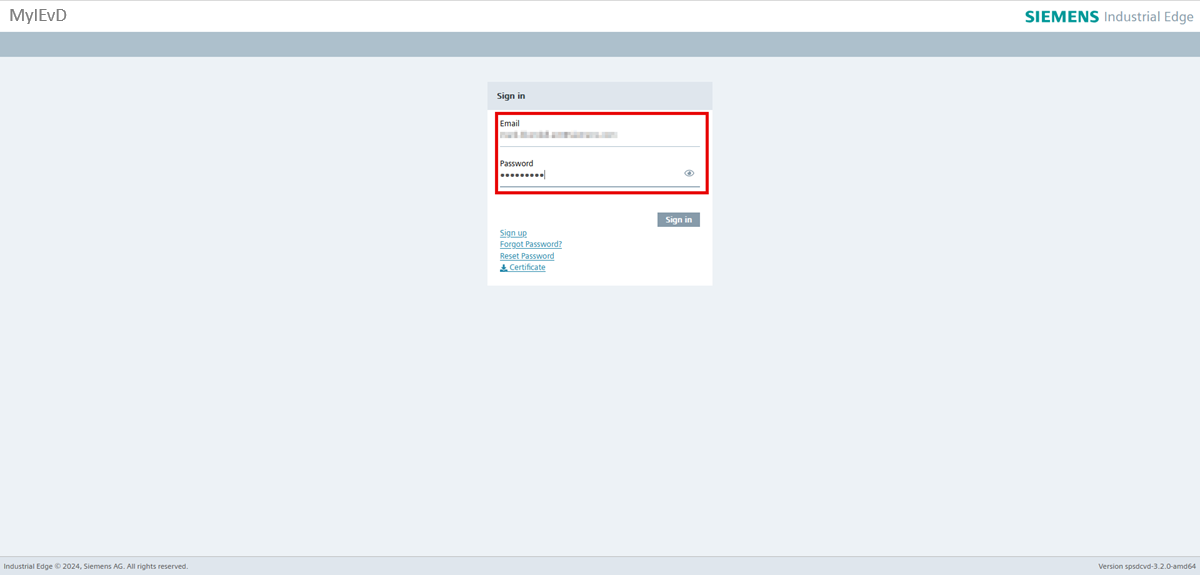
You are now logged into the device UI and the onboarding process is finished.
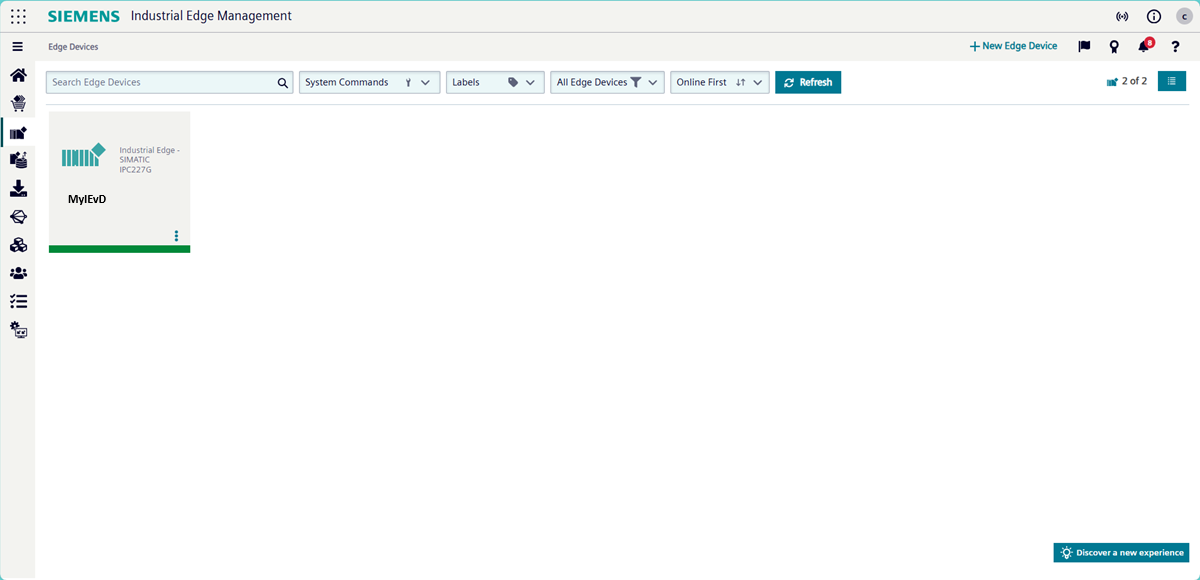
Validating the outcome
If you can log in to the device, the onboarding process was successful. To confirm a successful onboarding process, open IEM and click "Edge Devices". The onboarded IE Device appears to indicate it is online.
More information
Refer to the Industrial Edge documentation for more information about managing the onboarded IE Device.
What's next?
Proceed to Setting up IE Apps.