Configure OpenID Connect Client
This guide describes how to configure an OpenID Connect (OIDC) client to use OIDC identity providers (IdP) as external identity provider.
In this guide, Keycloak is used as identity provider. The procedure on other identity providers may differ but should have similar options.
Prerequisites
-
Only users with admin rights can configure a new OIDC client.
-
The respective user must exist on the Edge Device. The user will not be automatically created on the Edge Device. If the user does not exist yet, there will be a message indicating that the provided user has no access on the Edge Device.
-
Mapping is done via the email address of the user. The admin, that is taking care of the user management, must ensure that local users on the Edge Device own the email address that they have specified. Otherwise, it may be possible for the user who actually owns the email address to take over this account, when registering this email address on the identity provider.
OIDC Limitations
-
The OIDC provider must use the same root CA as the Industrial Edge Management or a public trusted CA.
-
The login via OIDC does not work with remote access to the Industrial Edge Device.
-
The OIDC provider is not automatically updated with the DNS name if you import a DNS-based certificate for the device. Please update the OIDC provider via API call with the DNS name as new redirect host. The client or application configuration at the identity provider has to be updated accordingly.
Configuration Procedure
Create new Client on OIDC Identity Provider
First, you must create a new client on your OIDC identity provider for your Edge Devices so that it is possible to get all needed OIDC information of the identity provider.
You must provide a client ID to identify the connected OIDC client later on the Edge Device:
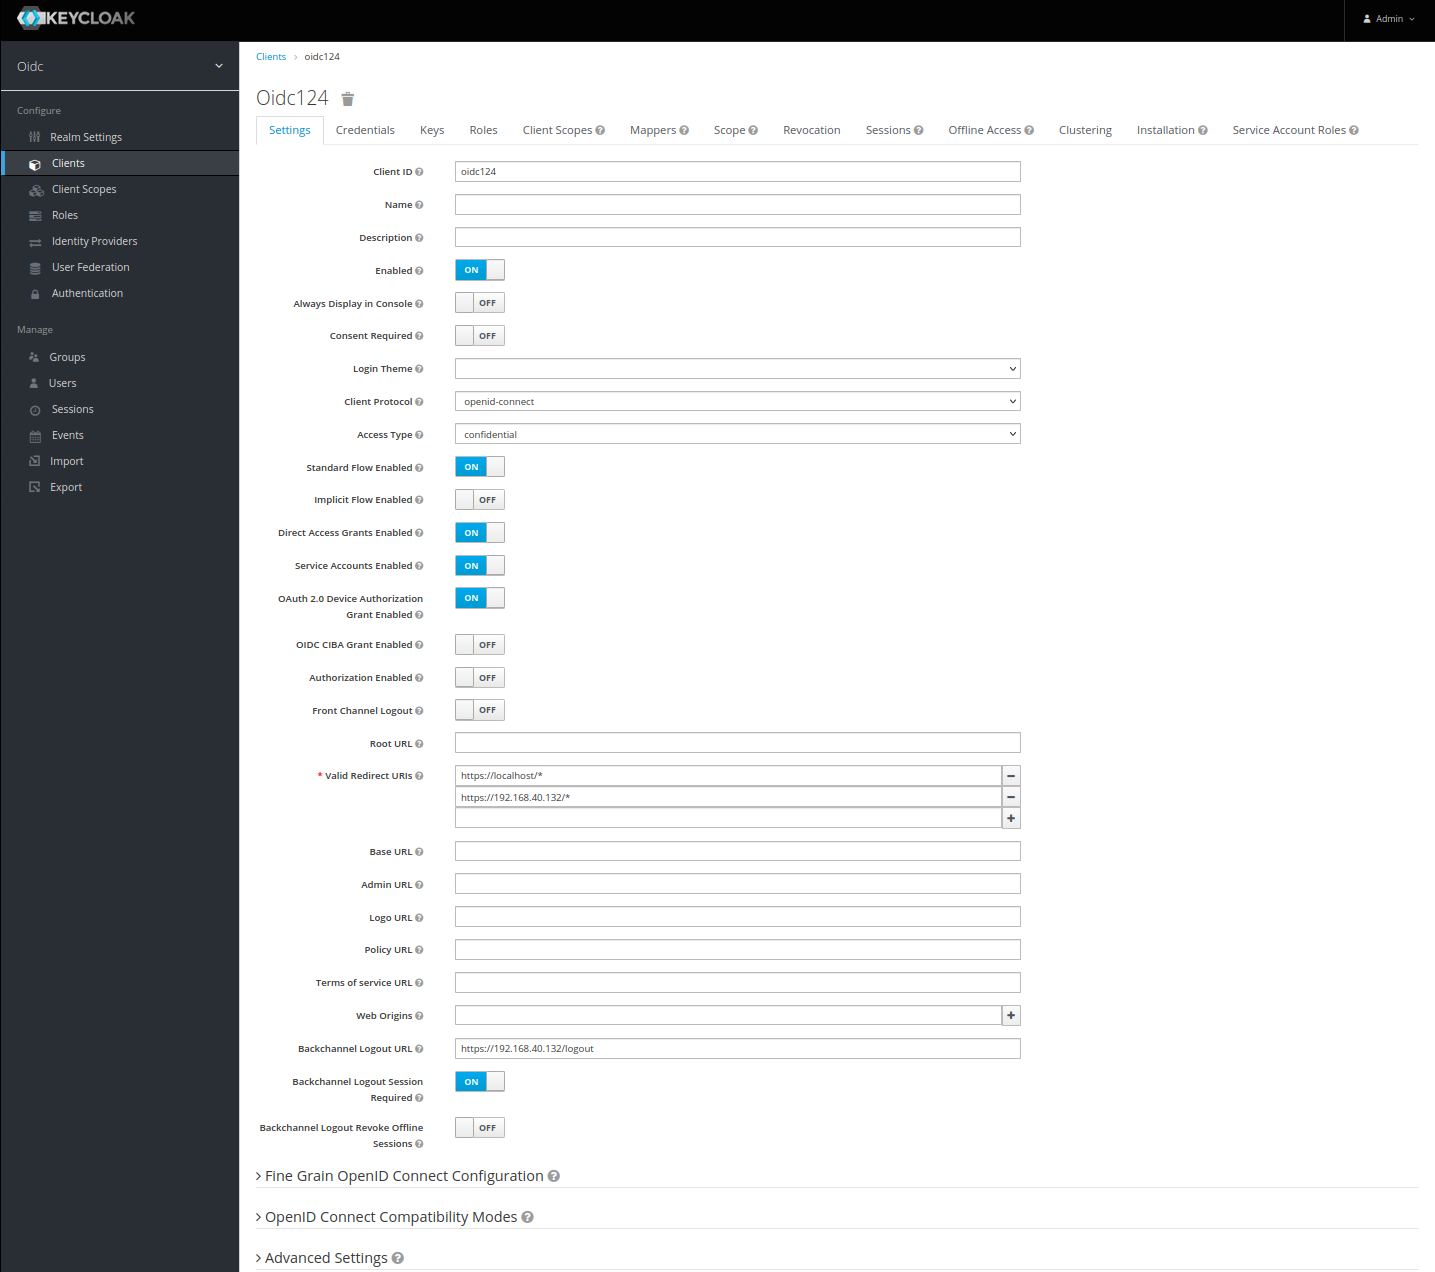
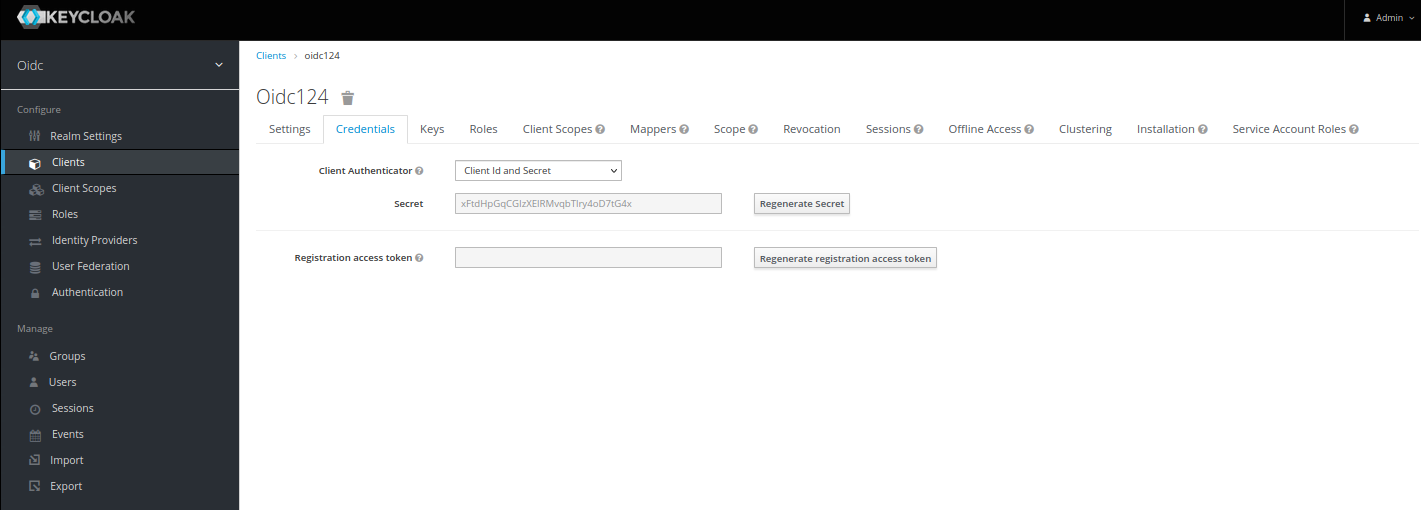
For the configuration on Edge Device side, you need the client ID and client secret. You find the client secret in the Credentials tab.
Configure OIDC Client on the Industrial Edge Device
Log into the Edge Device as admin:
curl -X POST \
  'https://<ip of device>/device/edge/api/v1/login/direct' \
  --header 'Accept: */*' \
  --header 'Content-Type: application/json' \
  --data-raw '{
    "username" : "iem.user@demo.com",
    "password" : "P@ssw0rd"
}'
Use your IP address, username and password to log into the Edge Device. You will receive an access code which you use for the next step.
Create the OIDC configuration as follows:
curl -X POST \
  'https://<ip of device>/device/edge/auth/api/v1/oidc-providers' \
  --header 'Accept: */*' \
  --header 'Authorization: {{access_token}}' \
  --header 'Content-Type: application/json' \
  --data-raw '{
    "OidcName":         "First IDP",
    "OidcClientId":     "oidc124",
 "OidcClientSecret": "SFHIVT9WhEEKTVgnJwYYClrKFUW6ZtHq",
 "OidcIssuer":       "https://<ip or DNS of keycloak>/auth/realms/customer",
 "OidcRedirectHost": "https://<ip of DNS ied>"
}'
Use your own parameters.
As response, you get the Universally Unique Identifier (UUID) of the OIDC configuration which you need for the callback information, if wildcard is not allowed in your identity provider.
NOTICE
By default a time offset of 5 seconds between the issuer and the Device is accepted. To change it manually, follow the instructions in this chapter.
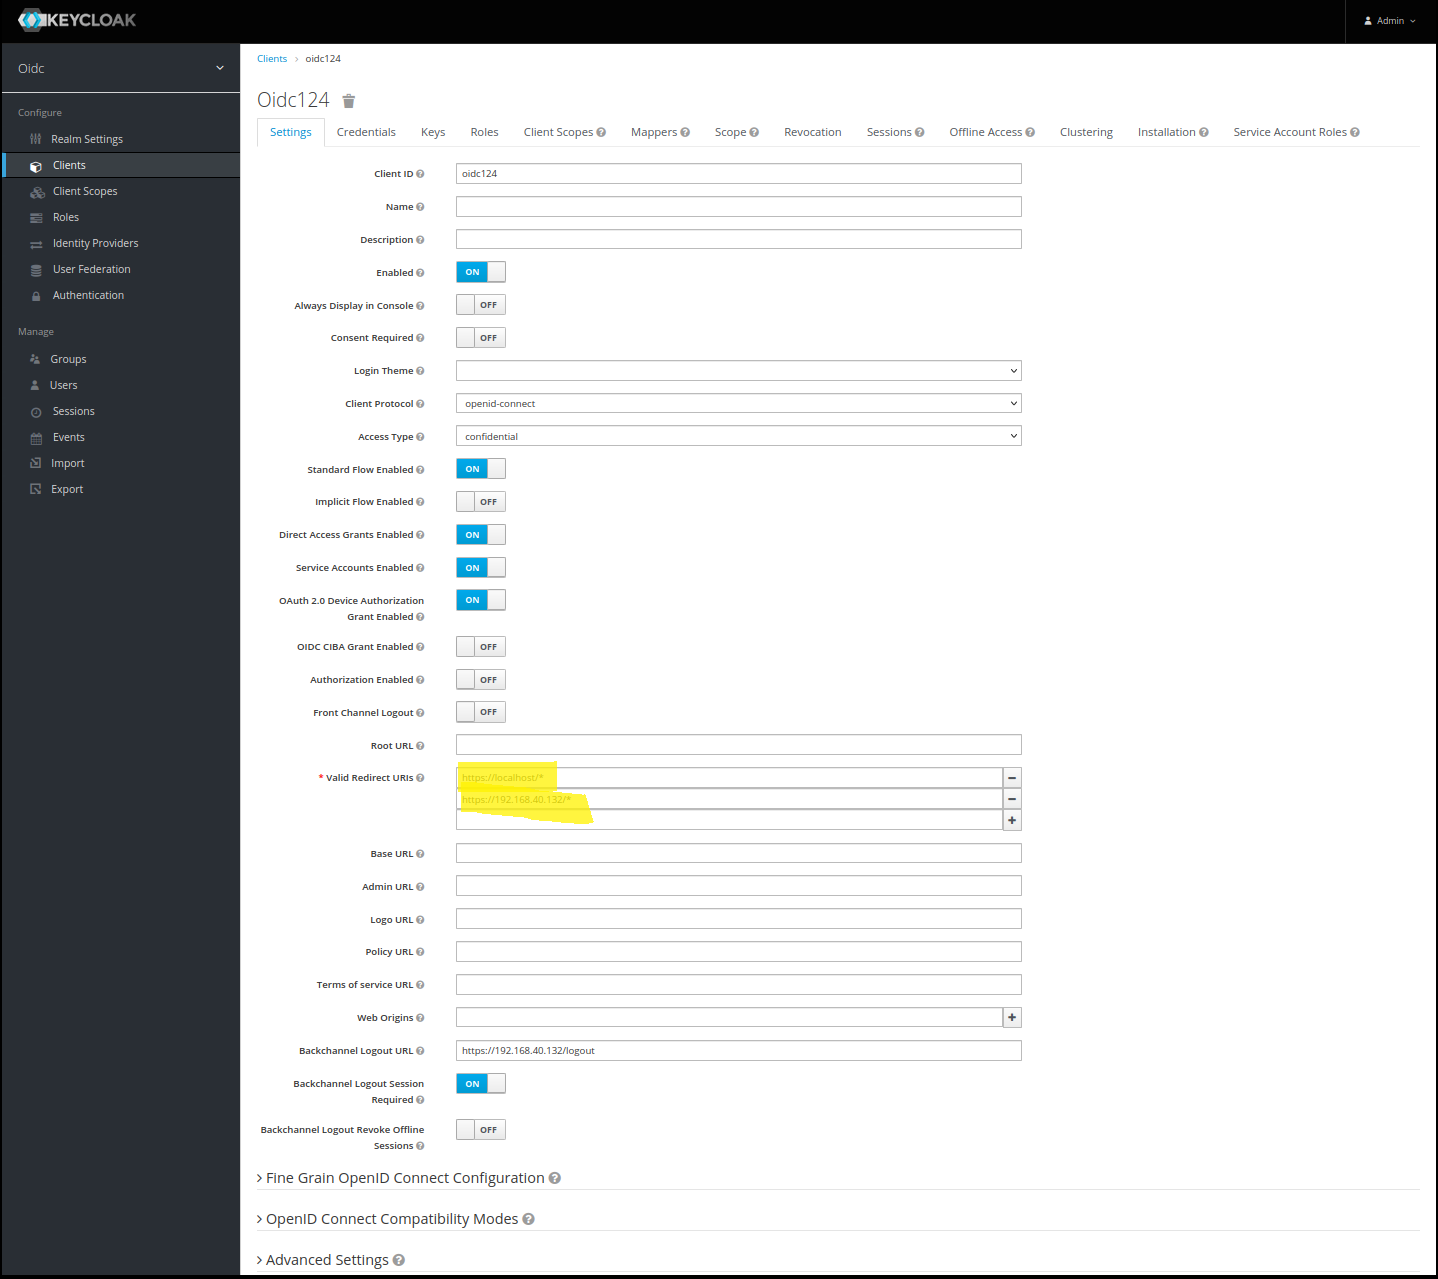
Add Information to OIDC Identity Provider
For security reasons the allowed redirect URLs must be configured in the IdP. To add an Industrial Edge device to the IdP, this callback address should be added to the IdP configuration. The entry should look like this: https://IED/device/edge/auth/api/v1/oidc-providers/callback where IED being the IP or DNS name of the Industrial Edge device.
OIDC Provider Global Config
The OIDC Provider /config endpoint, allows you to set global values for the configured OIDC-Providers.
Offset for token issue timestamp
Currently the /config endpoint allows the user to manage a allowed time offset for OIDC generated tokens.
This feature becomes particularly valuable when the OIDC Provider and the Device (IE Device) are synchronized to different NTP Servers, resulting in a slight offset of the token's issued timestamp and therefore forbidding the login with the provided token.
An example error when this happens is shown in the following image:
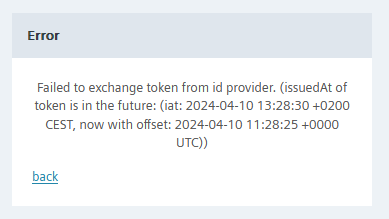
In the given example, the error shows a time offset of 5 seconds between the two timestamps.
NOTICE
The displayed timestamps already include the configured offset.
For example, if the configured offset was set to 10 seconds, the total time difference between the servers would be 15 seconds. This means that the minimum allowed offset of 15 seconds is required for a successful login in this particular setup.
To configure the time offset or ClockSkew the API can be used as following:
Log into the Edge Device as admin, like described in the previous chapter and use the access_token for the config call.
curl -X POST \
  'https://<ip of device>/device/edge/auth/api/v1/oidc-providers/config' \
  --header 'Accept: */*' \
  --header 'Authorization: {{access_token}}' \
  --header 'Content-Type: application/json' \
  --data '{
      "oidcClockSkew": 6000
    }'
Login Workflow
Once the new OIDC configuration is created, there will be a new login option on the Edge Device to log in via the configured identity provider.
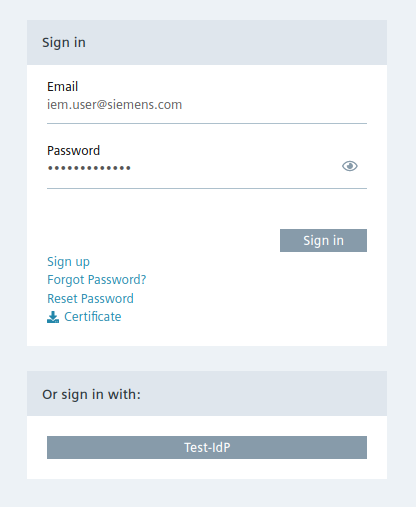
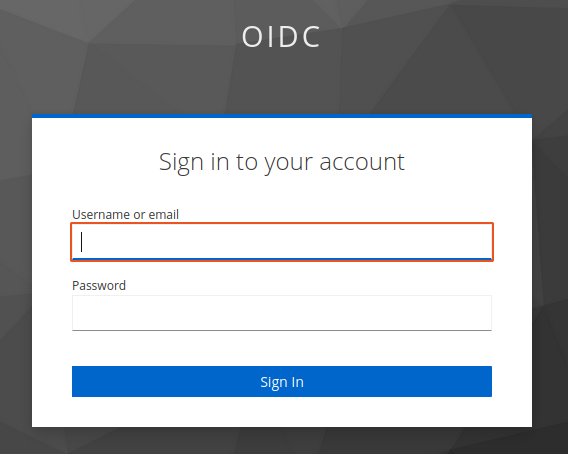
When using the new login option, you will be redirected to the configured identity provider to log into the Edge Device.
If you are already logged into the identity provider, you will be automatically logged into the Edge Device.
Known Issues
| Issue | Troubleshooting |
|---|---|
| OIDC Login not possible with Internet Explorer | Please use a different browser. |
| The Industrial Edge Device continuously shows a Session Expired screen after a false login attempt via OIDC. The errors could be: - Login via OIDC but user does not exist - Login via OIDC but user is not approved - Login via OIDC but the OIDC user has not set an email address |
1. Correct the error. 2. Log in with email address and password and log out again. |